
We acknowledge the Wurundjeri Woi-Wurrung People as the Traditional Owners of the land on which the The Connections Travel Group & their companies are built.
Steps to configure Azure AD Single Sign-On (SSO) Login into WordPress(WP)
1. Setup Azure AD as IdP (Identity Provider) for WordPress Single Sign-On (SSO)
Follow the steps below to configure Azure AD as IdP for WordPress
 Configure Azure AD as IdP
-
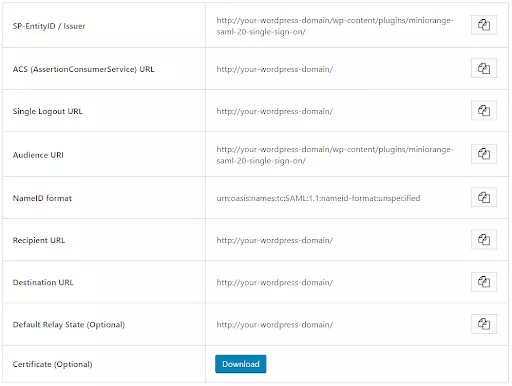
- In the WordPress SAML SP SSO plugin, navigate to Service Provider Metadata tab. Here, you can find the SP metadata such as SP Entity ID and ACS (AssertionConsumerService) URL which are required to configure Azure AD as the Identity Provider.
-
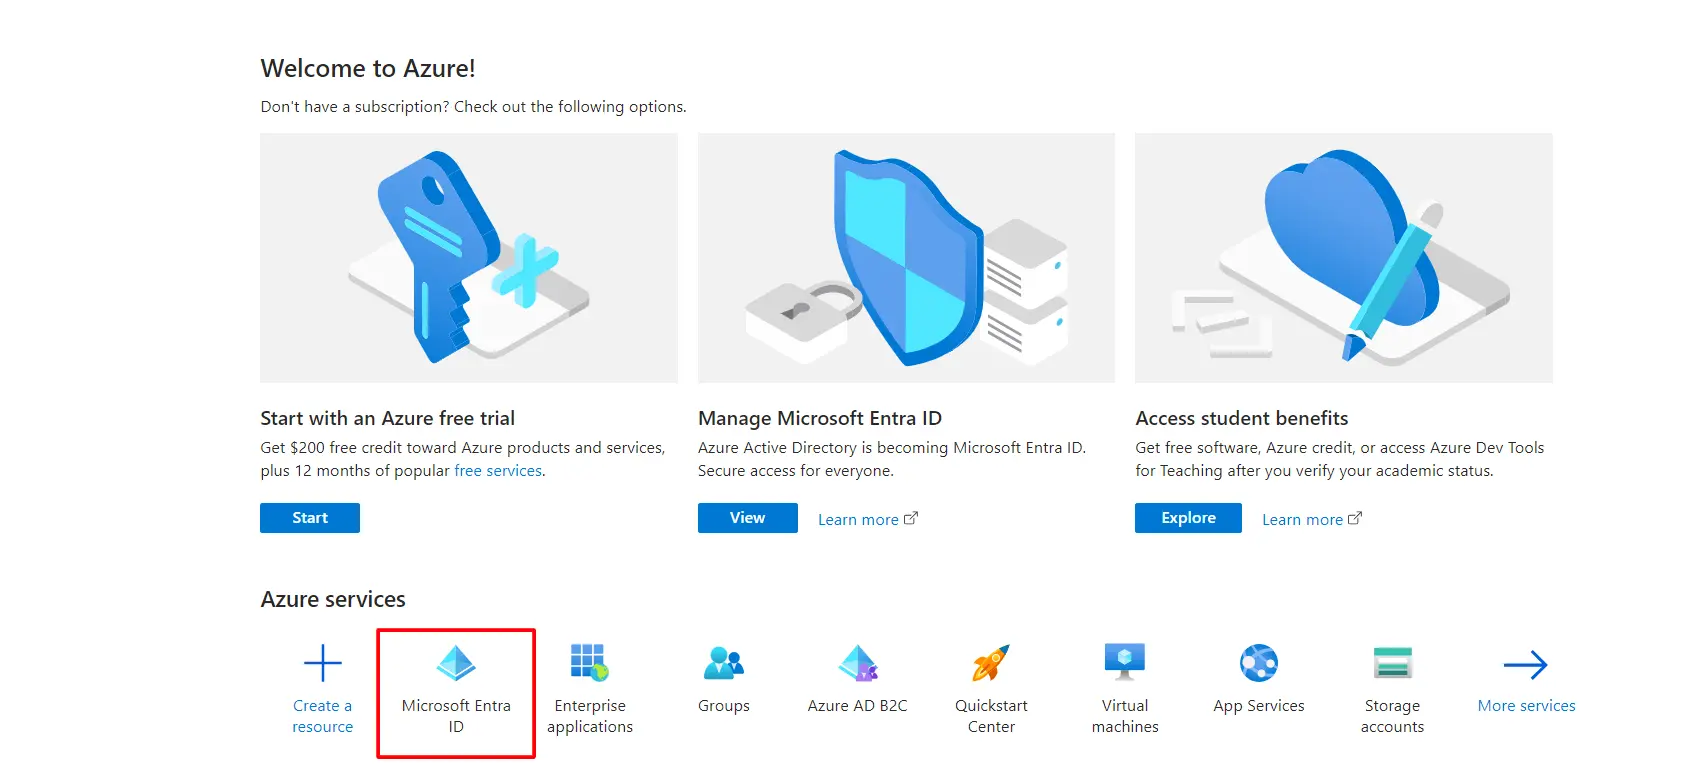
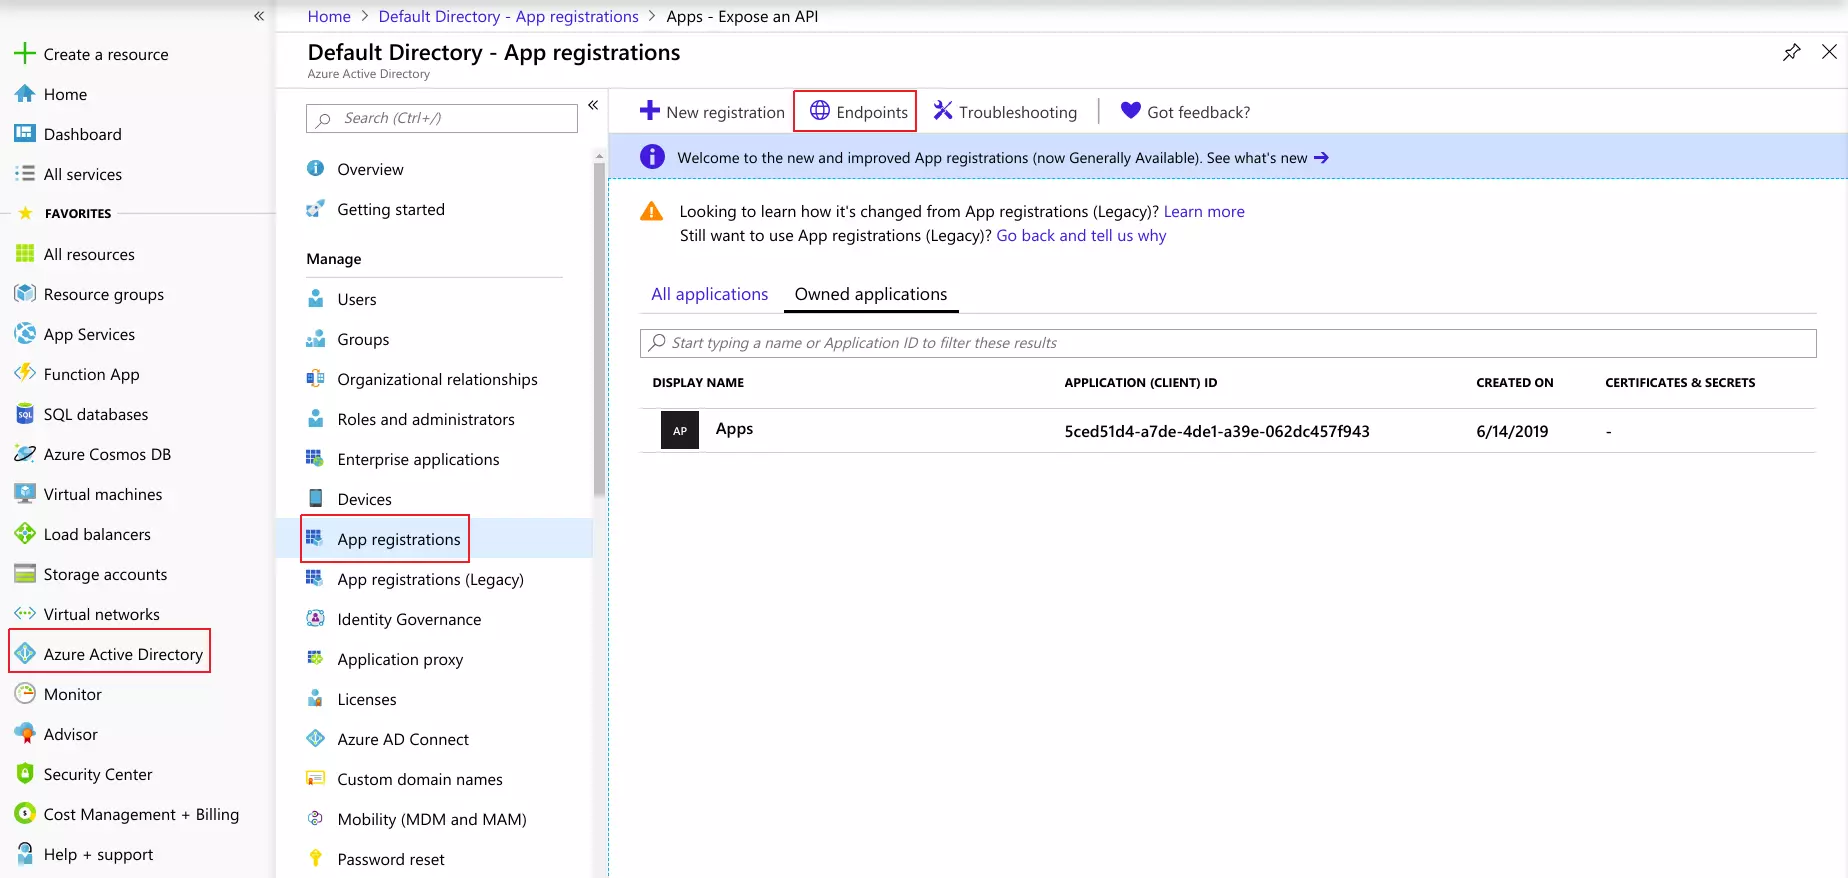
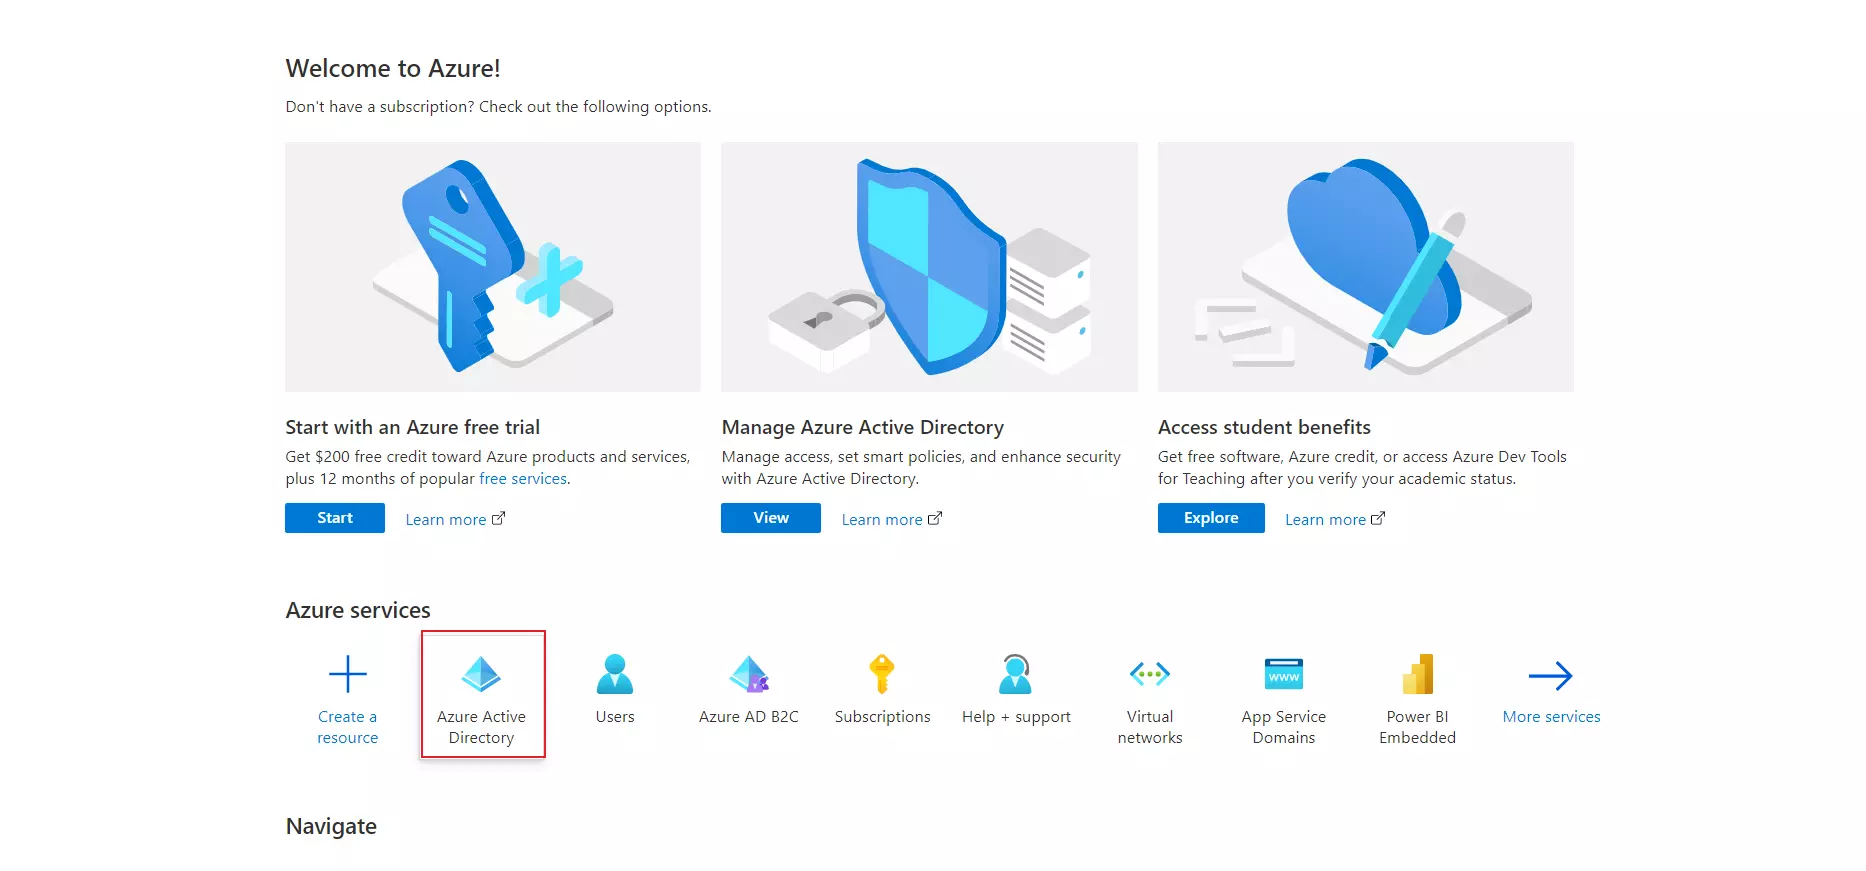
- Log in to Azure AD Portal
-
- Select Azure Active Directory.
-
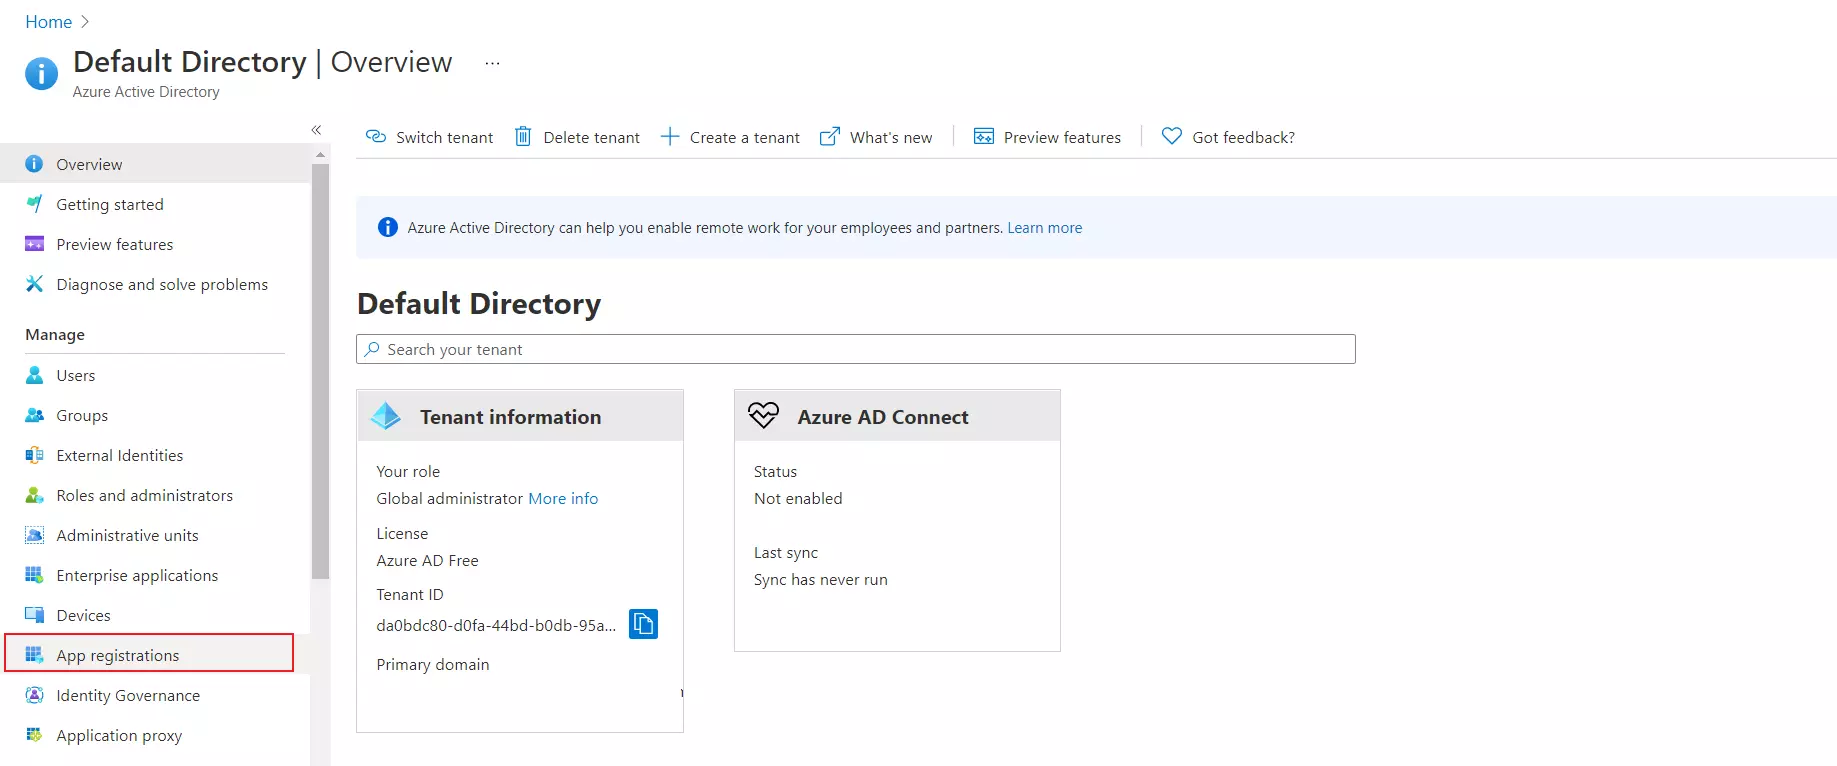
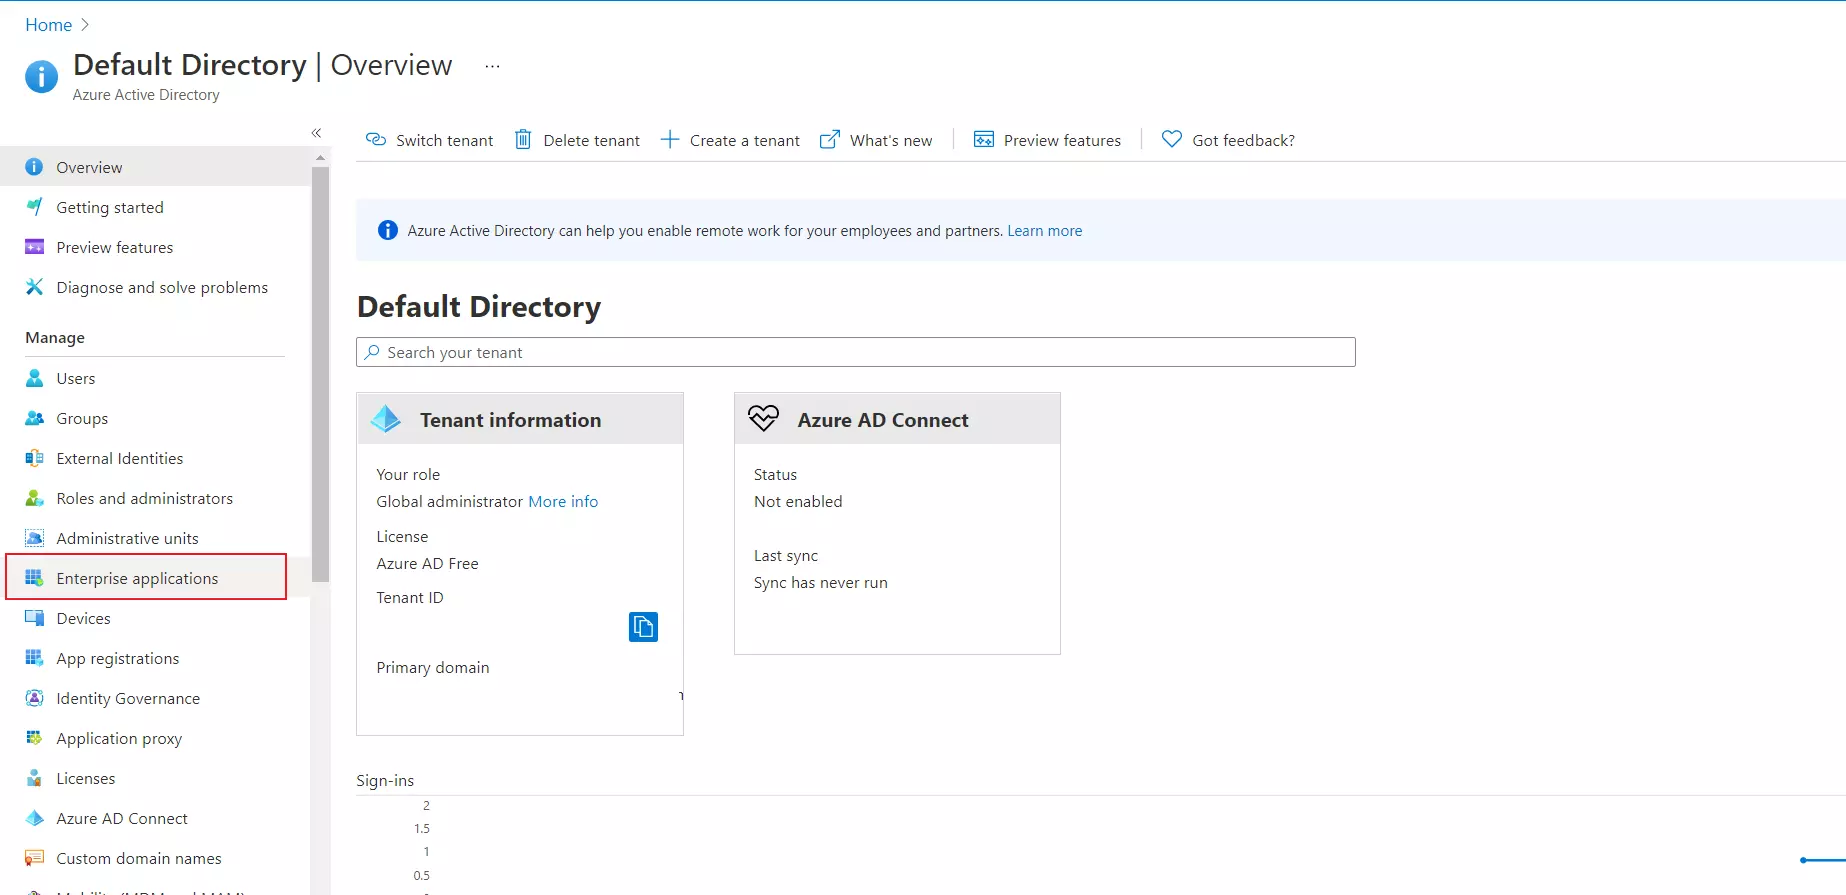
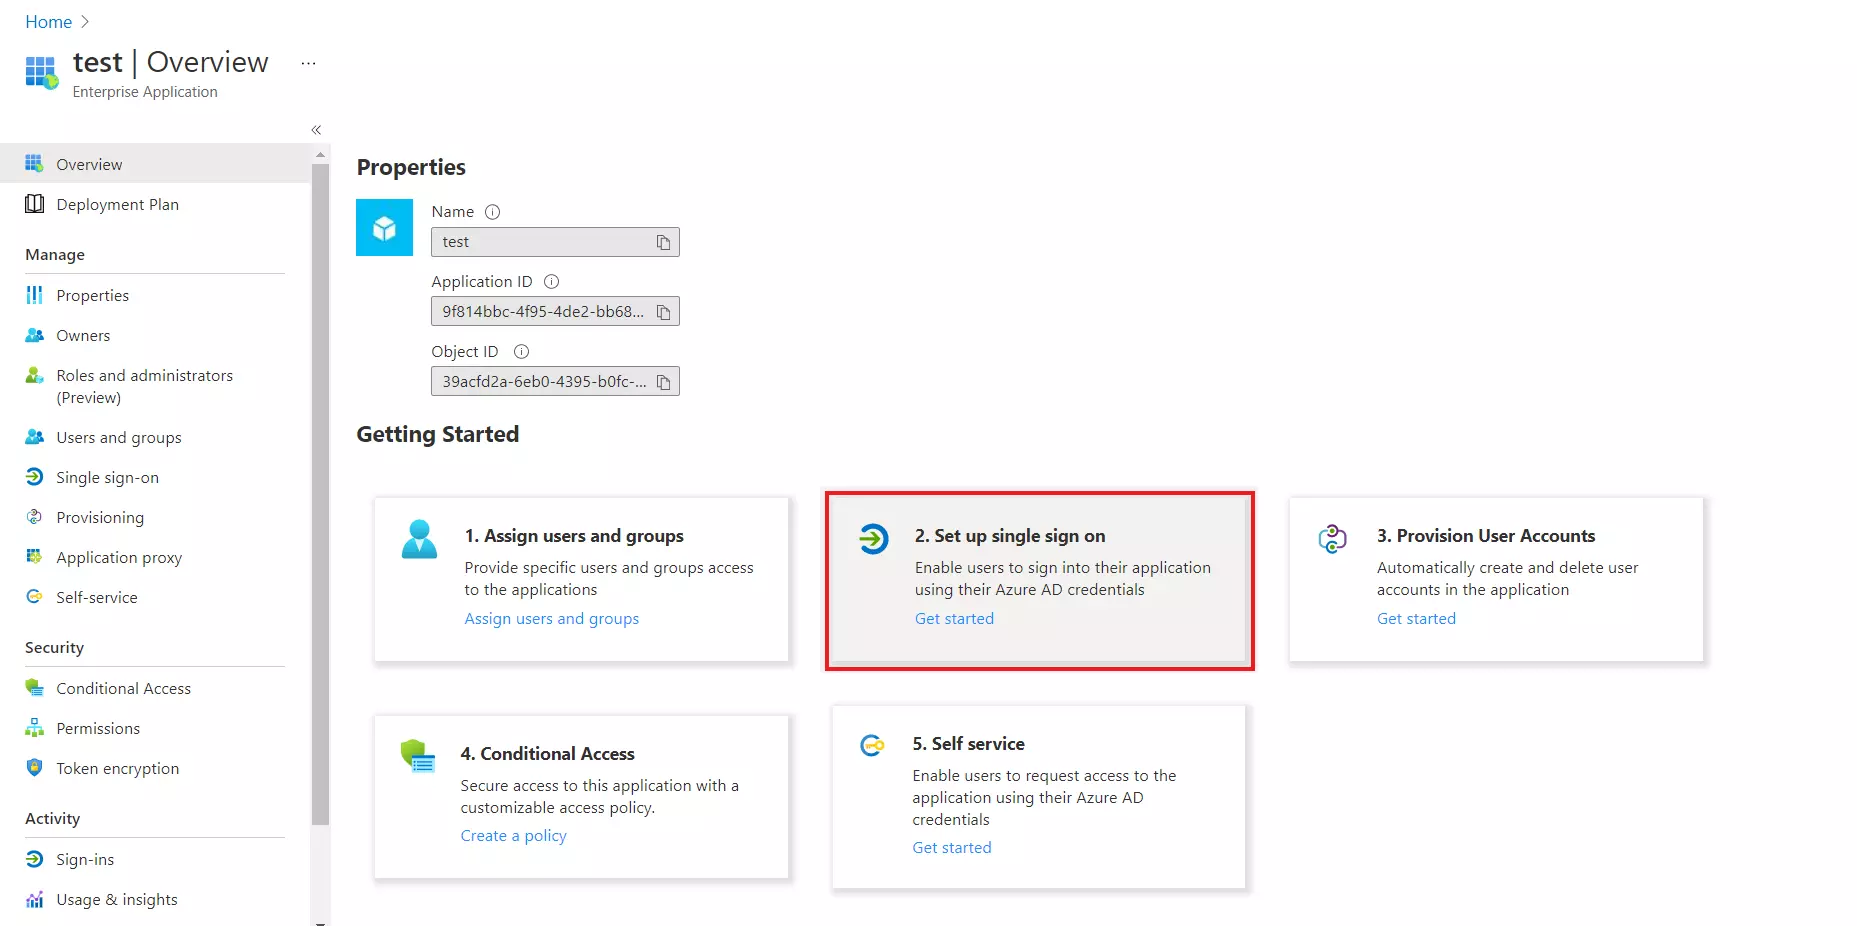
- Select Enterprise Application.
-
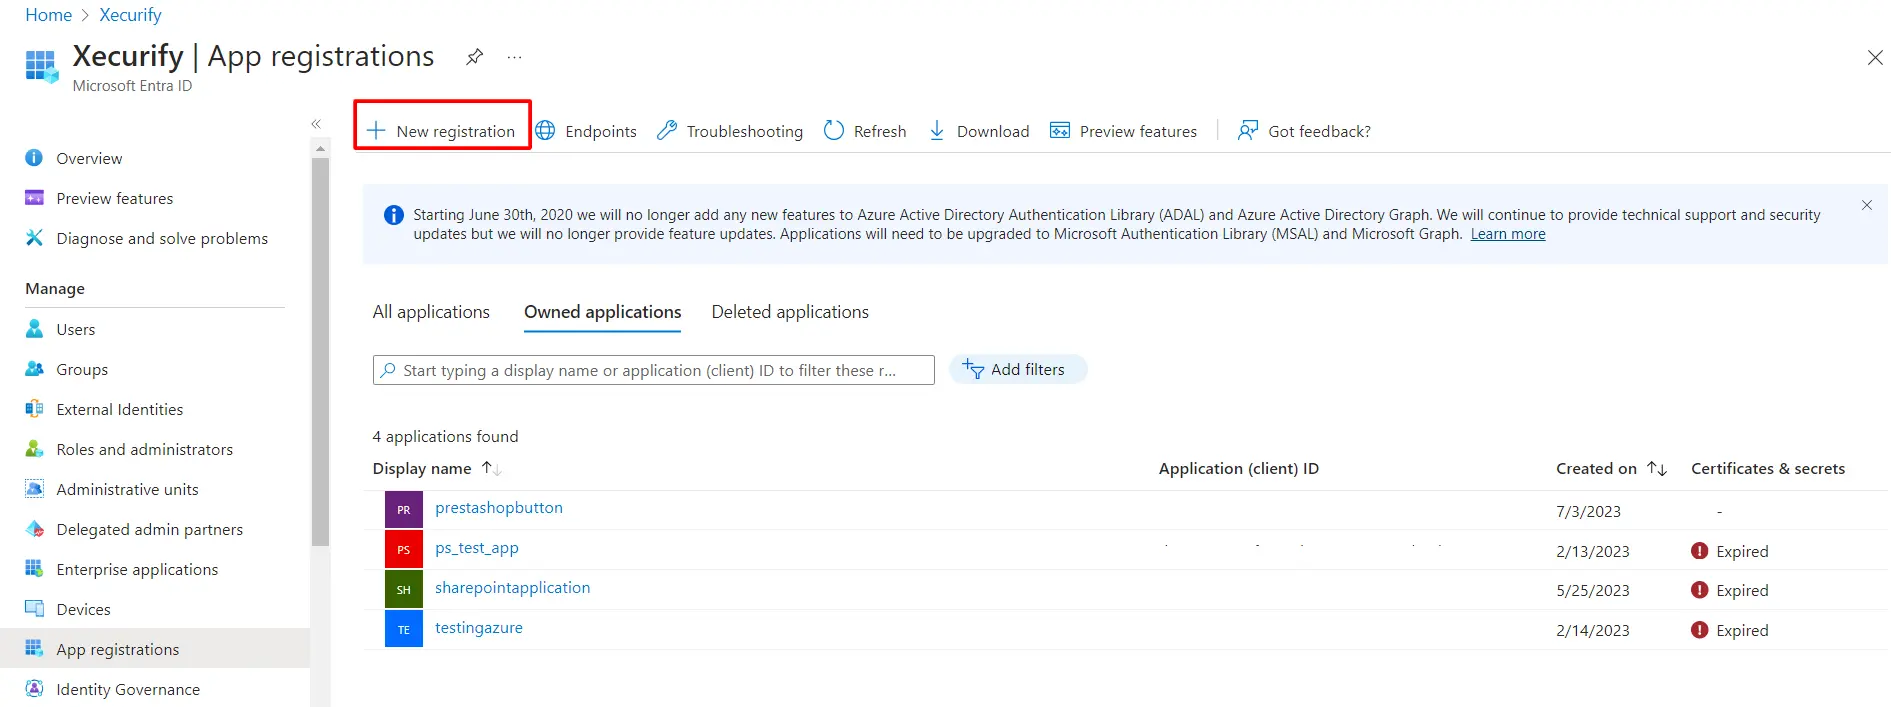
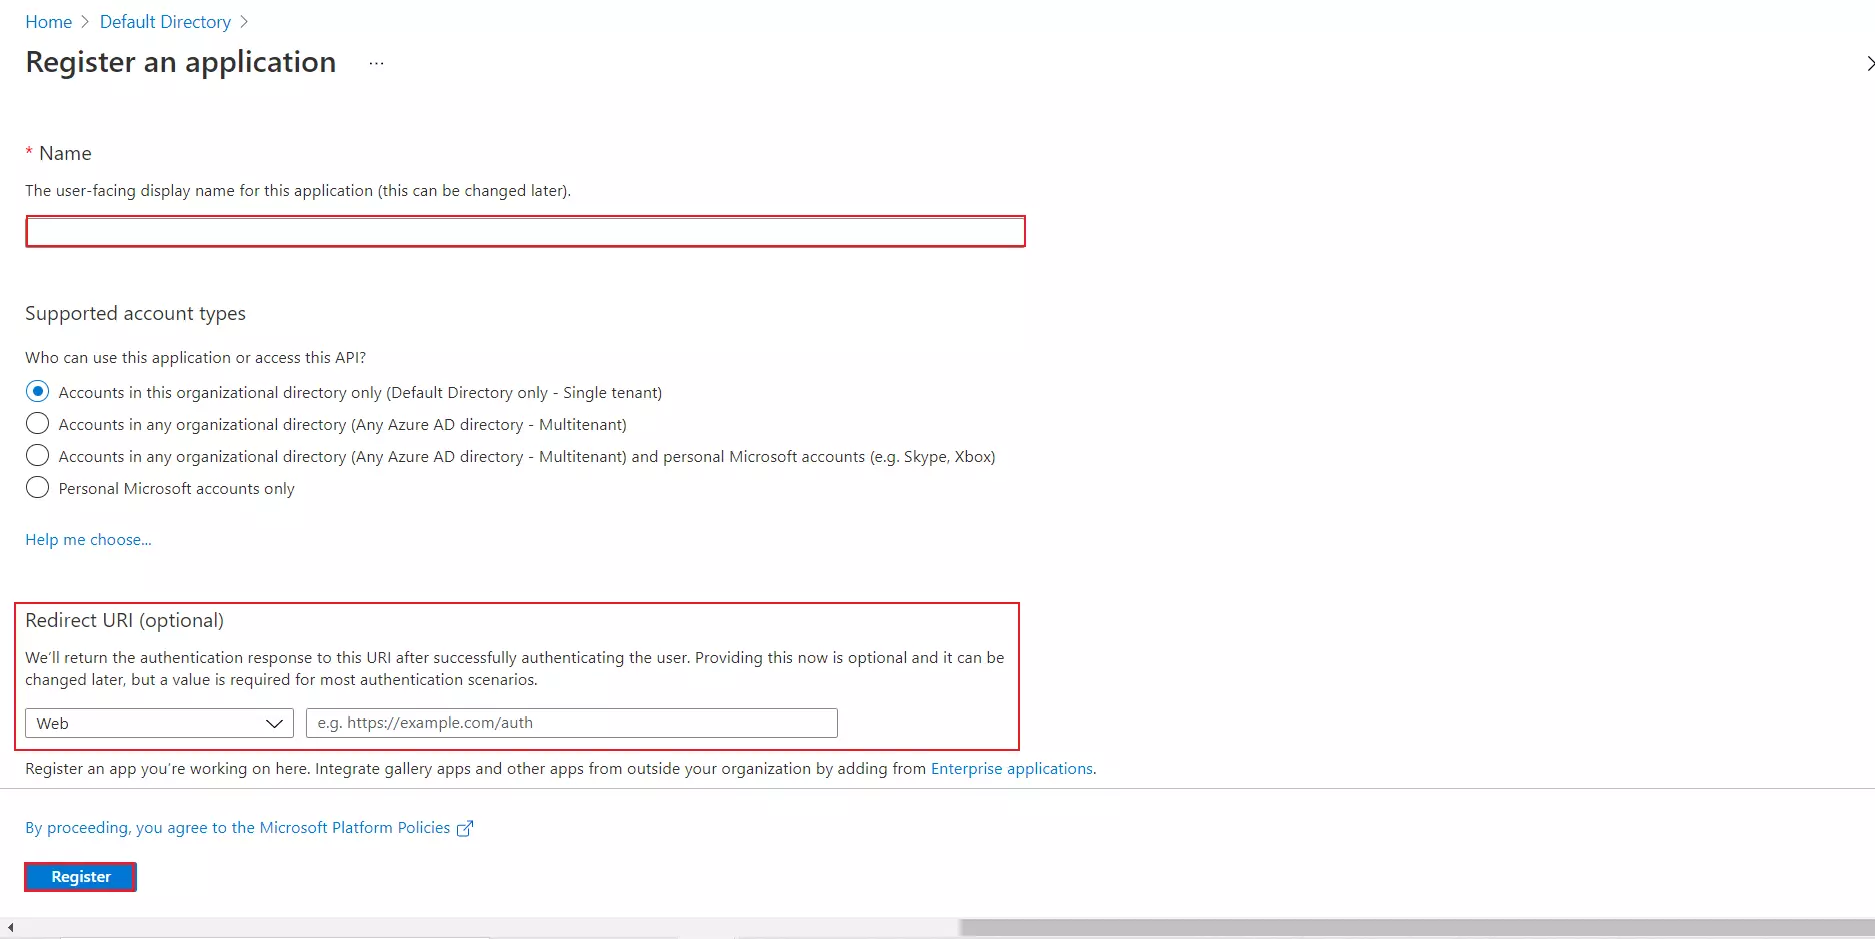
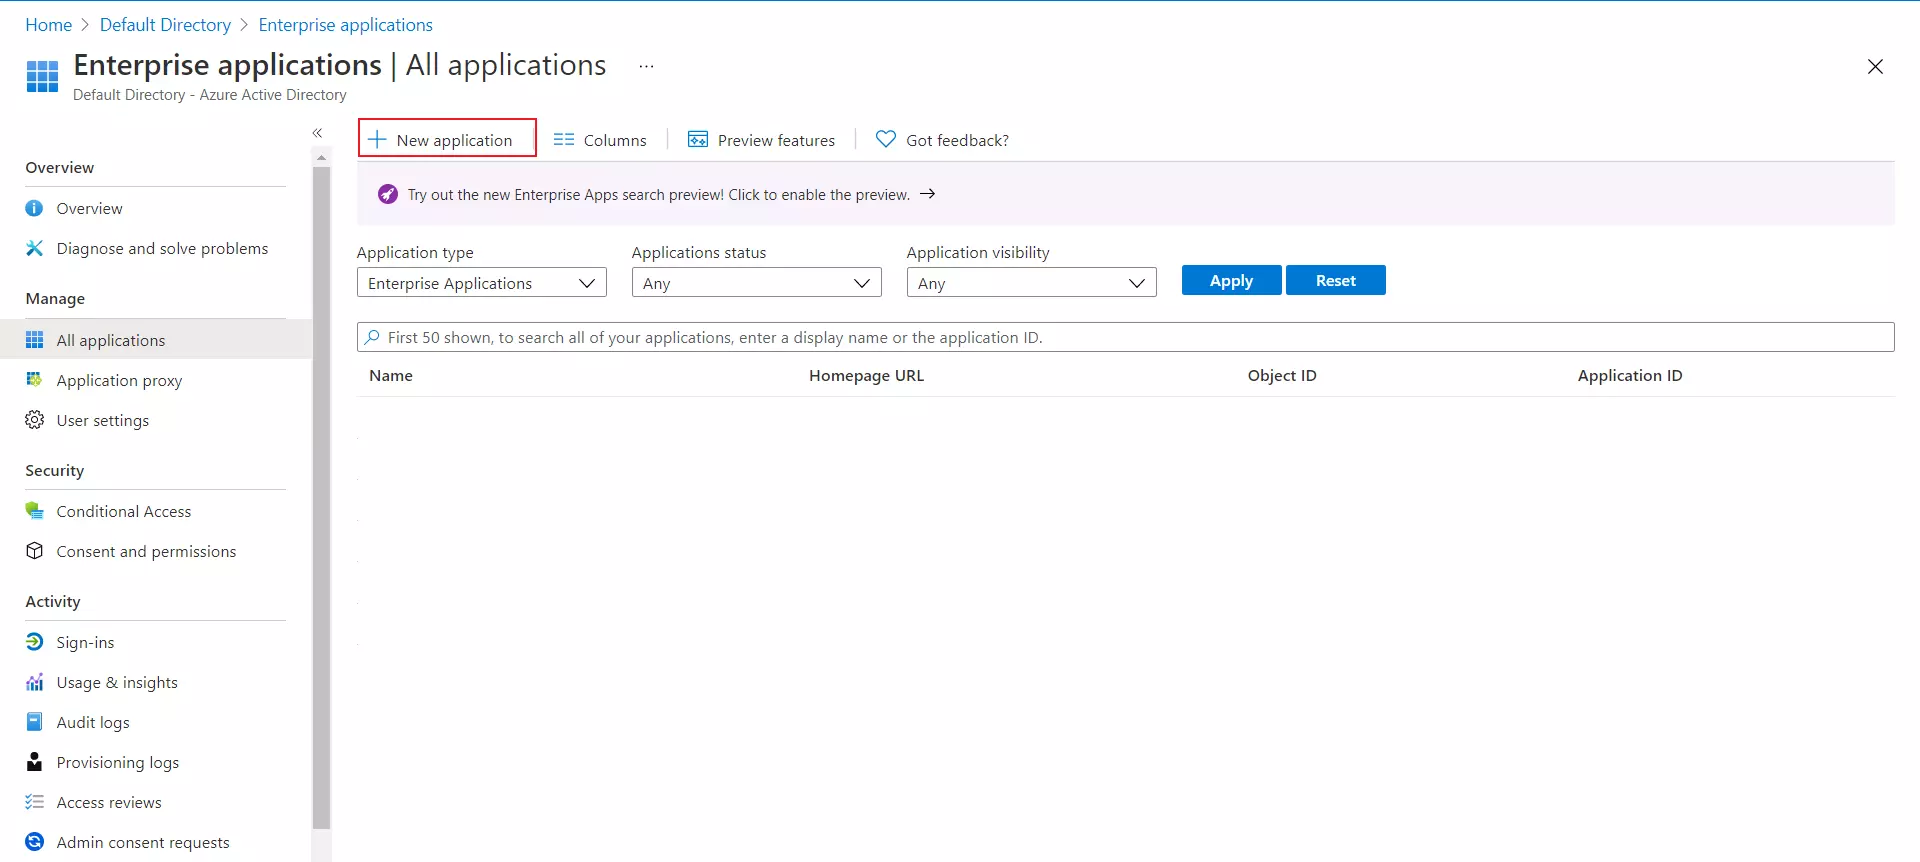
- Click on New Application.
-
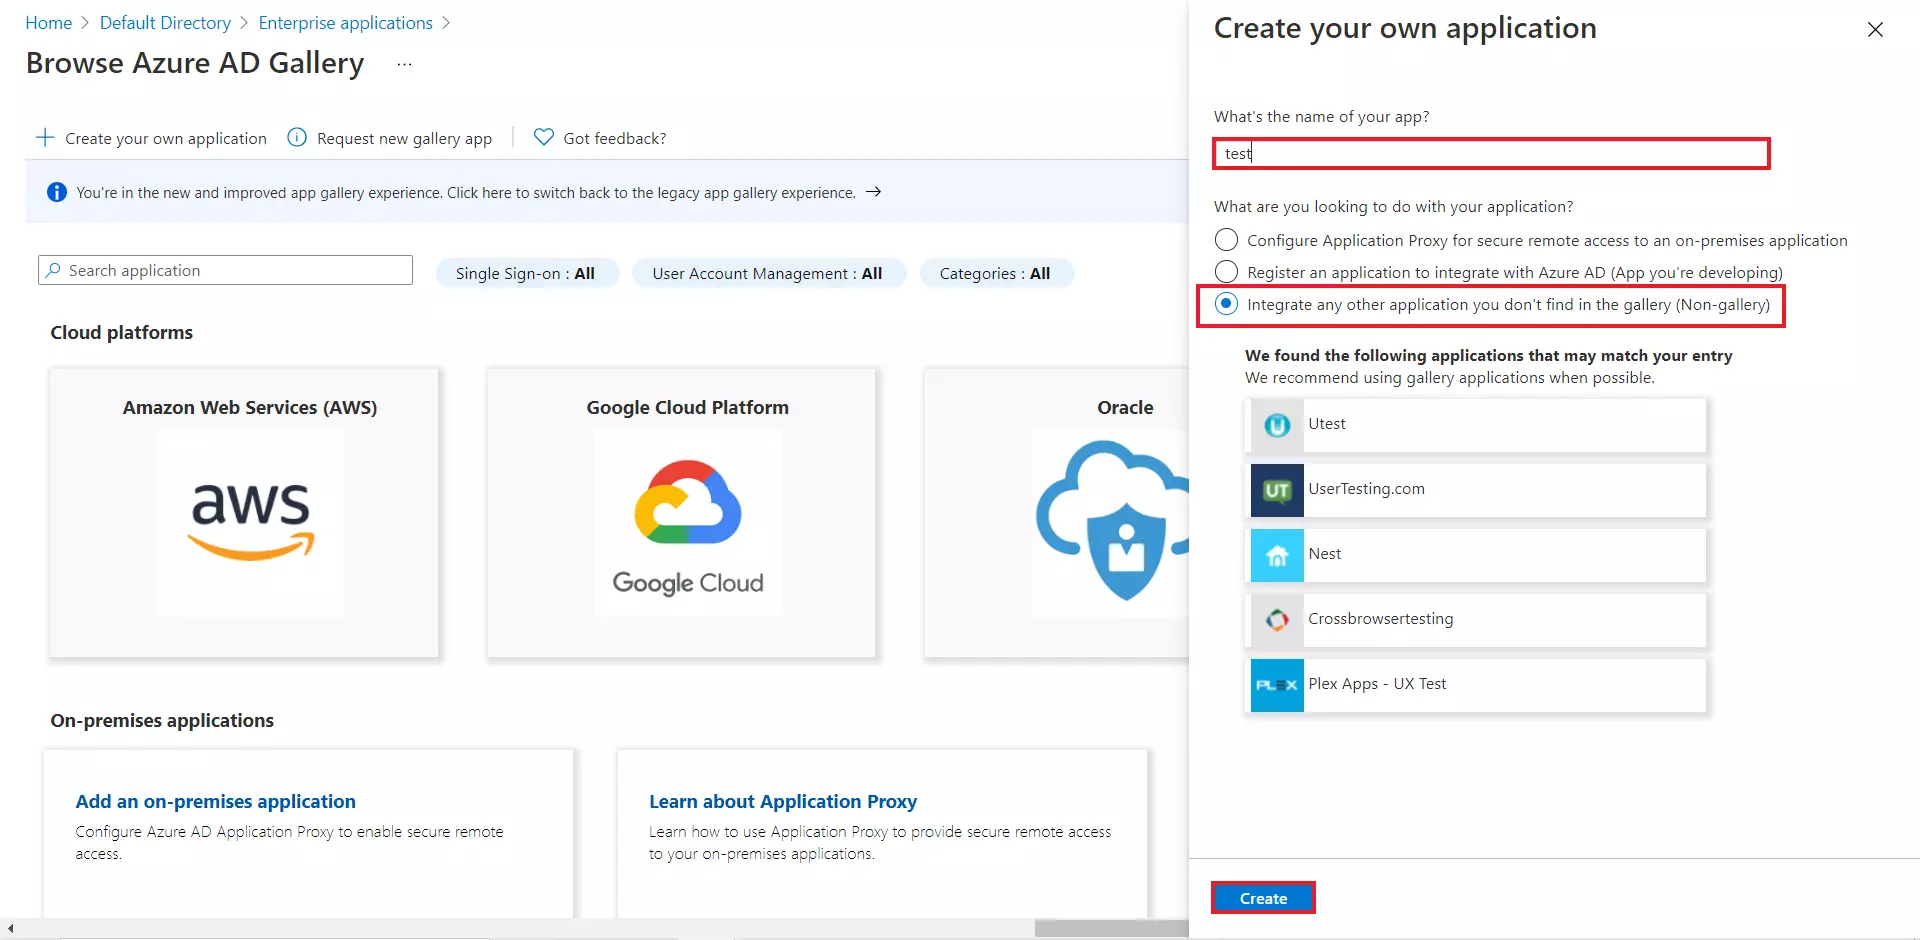
- Click on Create your own Application.

-
- Enter the name for your app, then select Non-gallery application section and click on Create button.
-
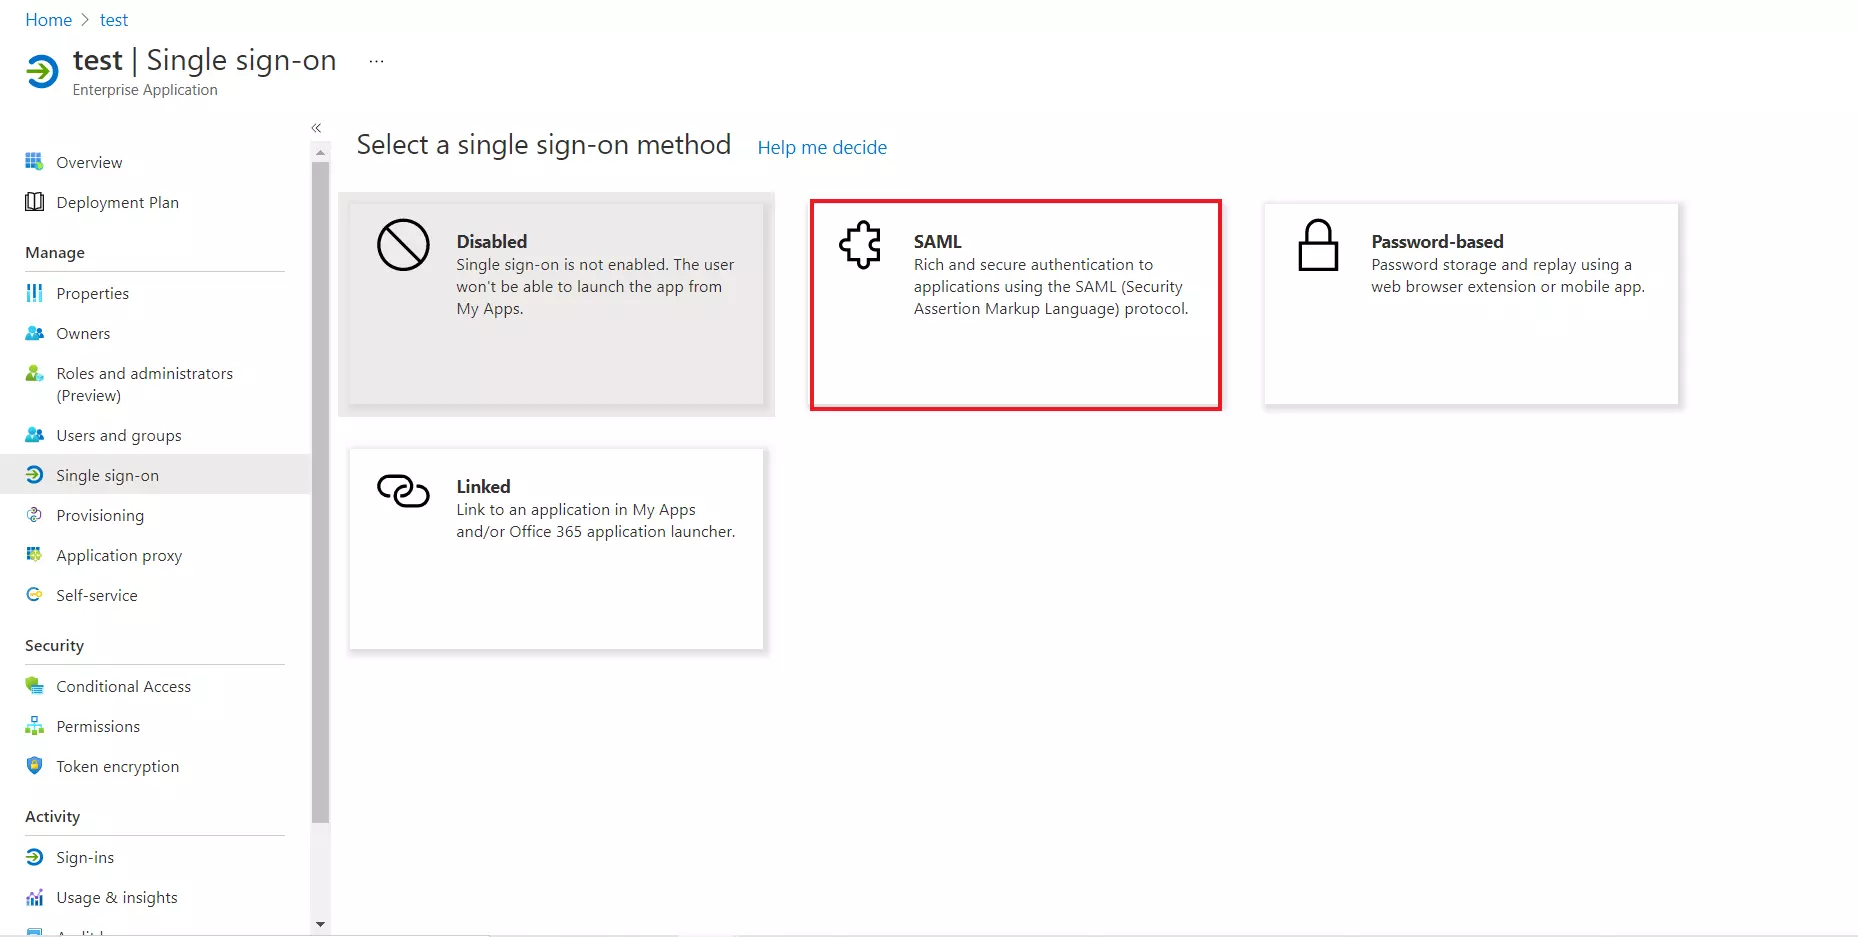
- Click on Setup Single sign-on .
-
- Select the SAML tab.
-
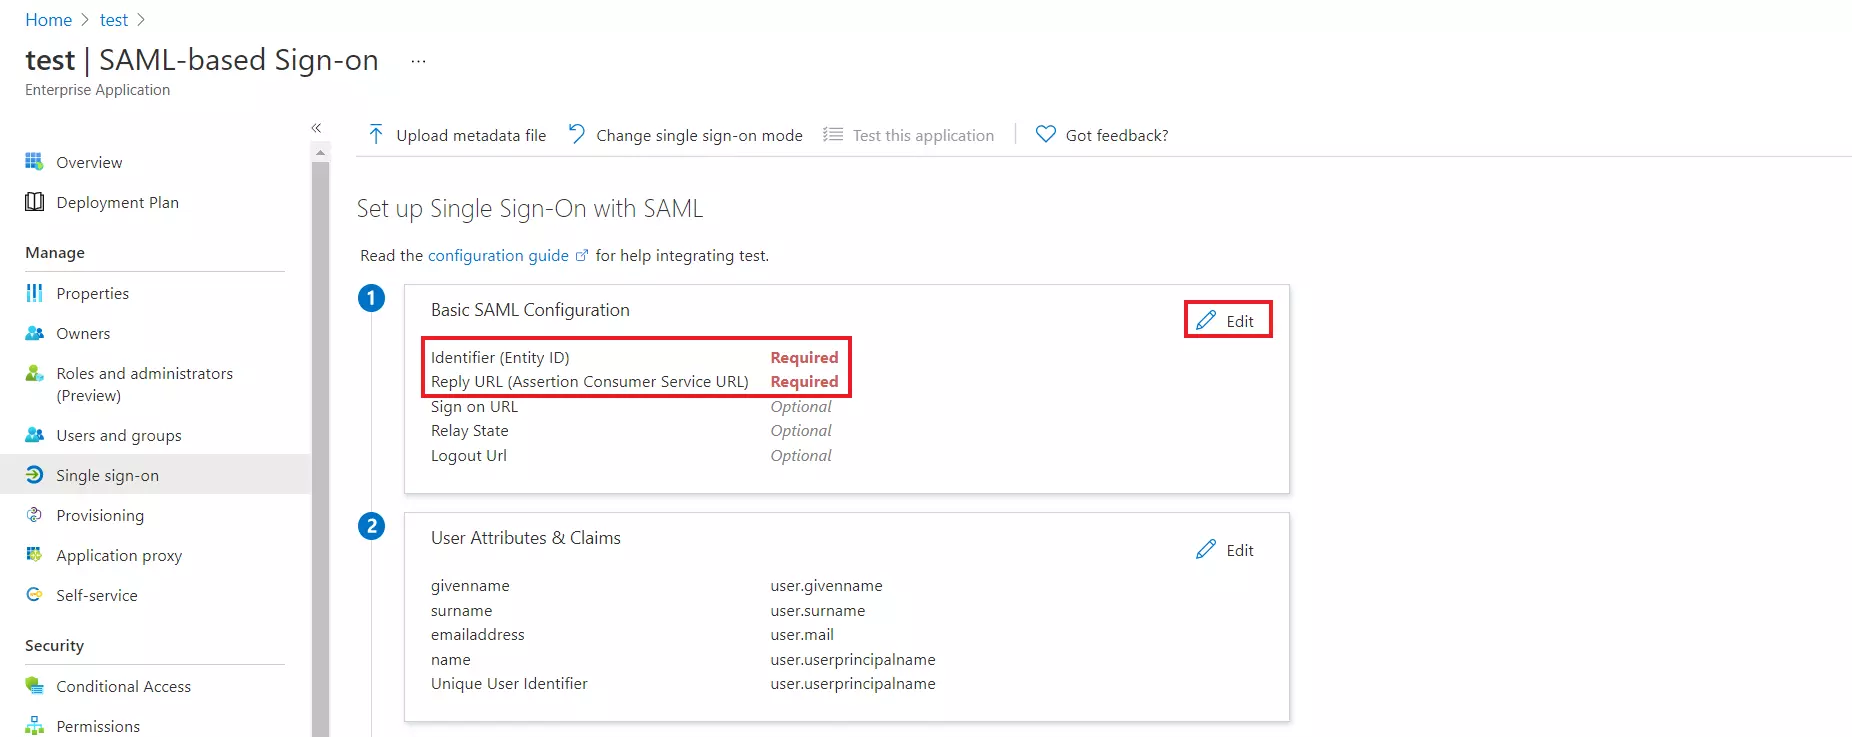
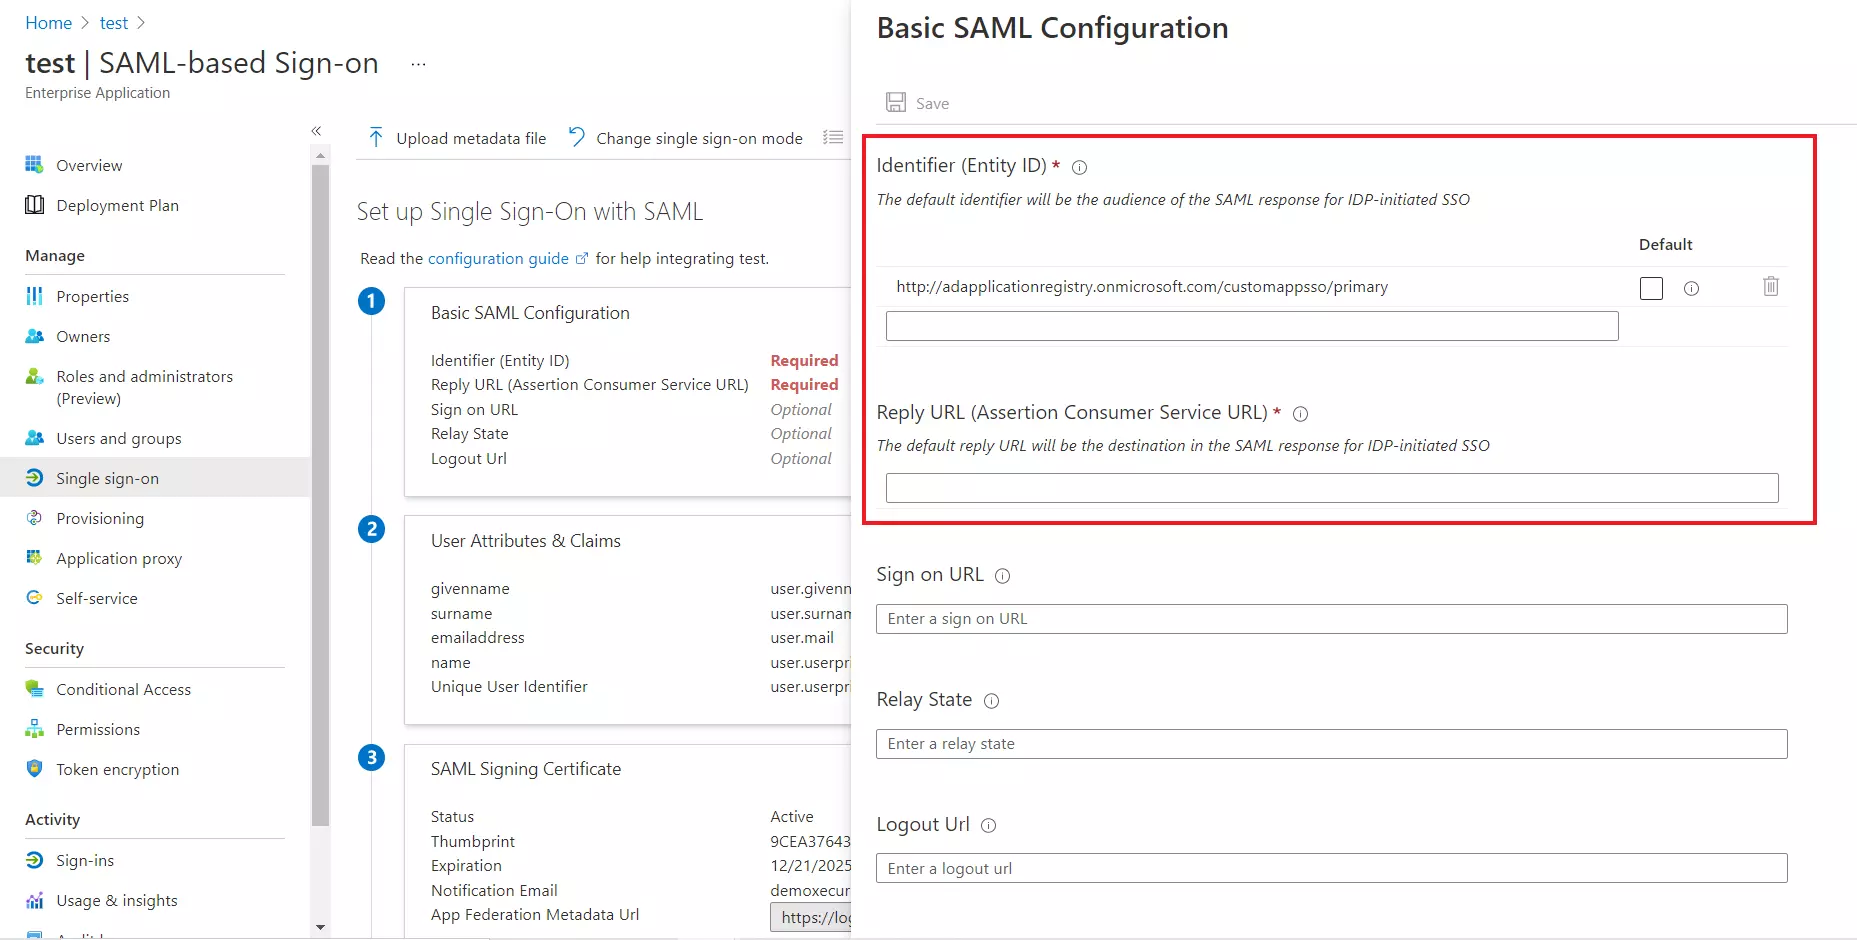
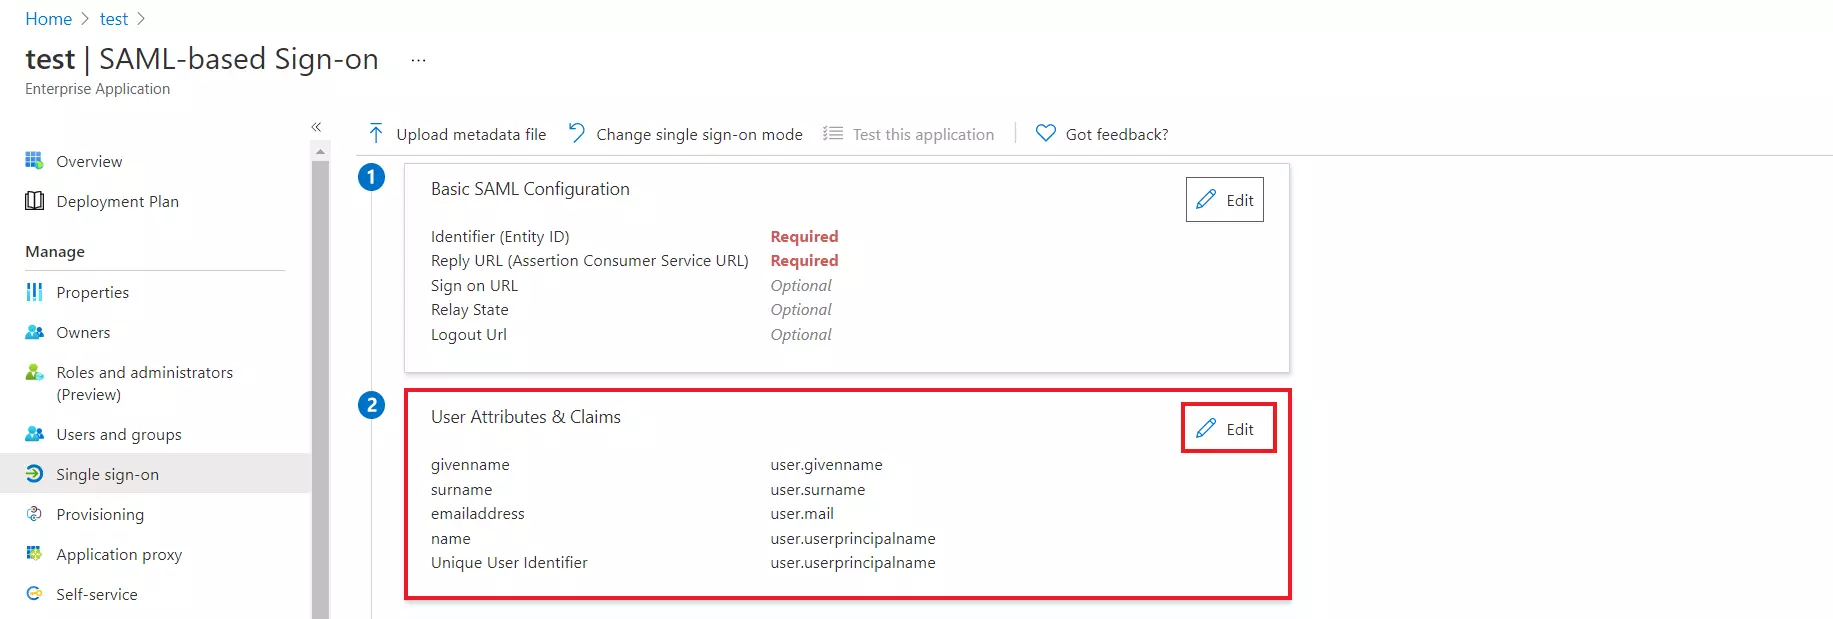
- After clicking on Edit, enter the SP Entity ID for Identifier and the ACS URL for Reply URL from Service Provider Metadata tab of the plugin.
-
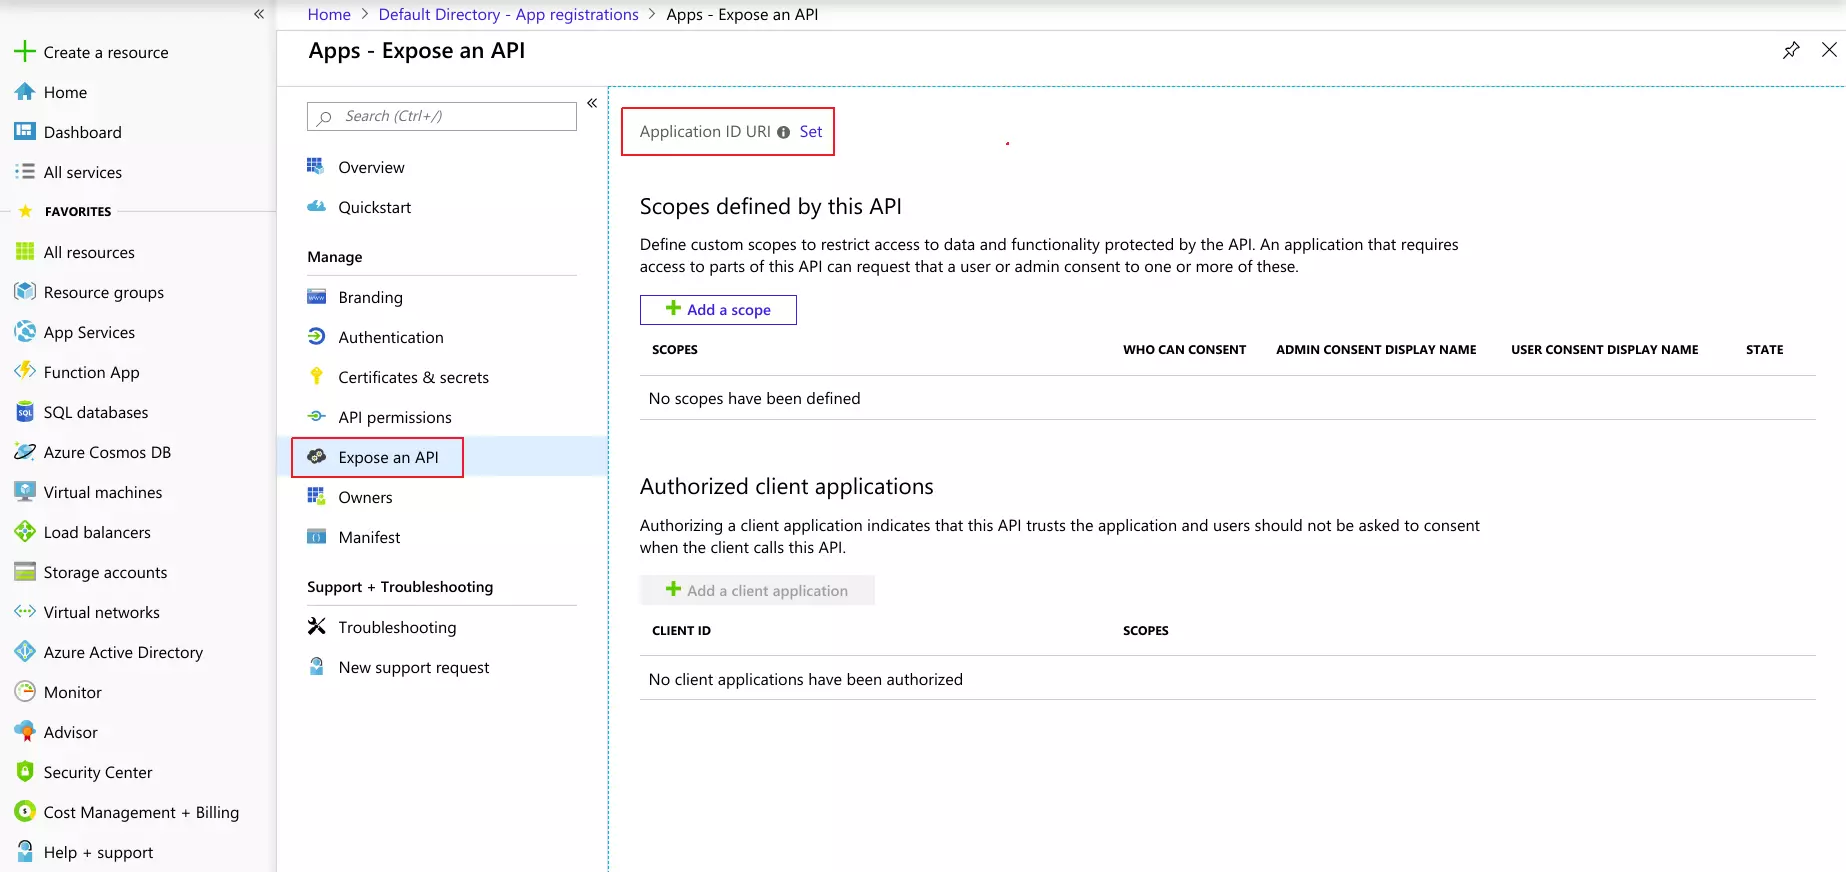
- By default, the following Attributes will be sent in the SAML response. You can view or edit the claims sent in the SAML response to the application under the Attributes tab.
-
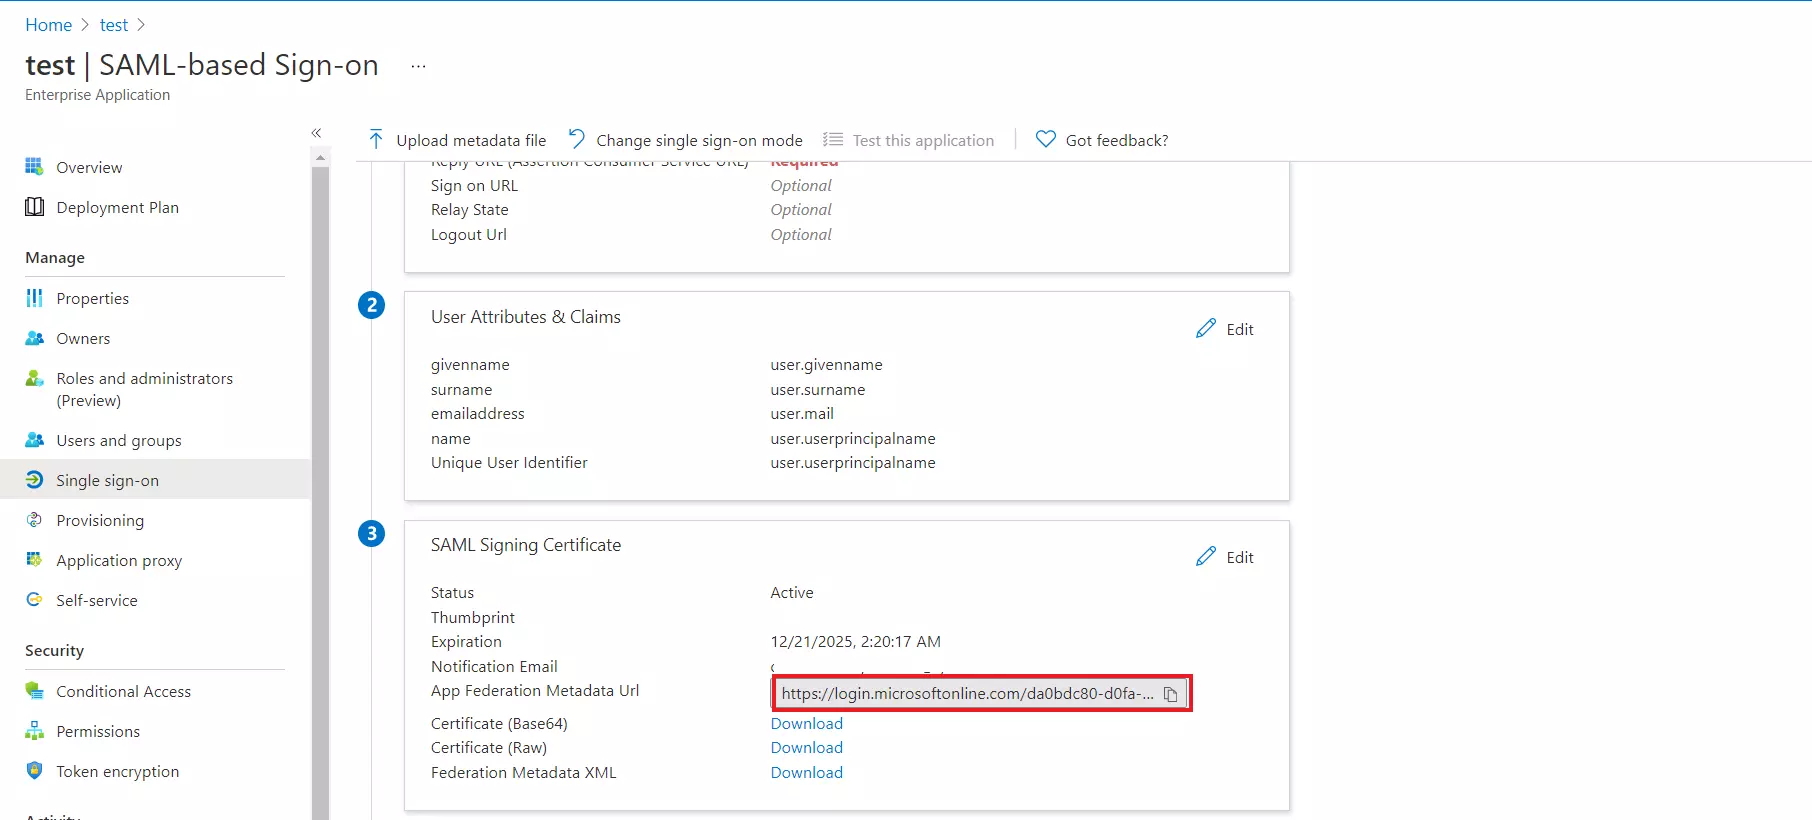
- Copy the App Federation Metadata Url to get the Endpoints required for configuring your Service Provider.
-
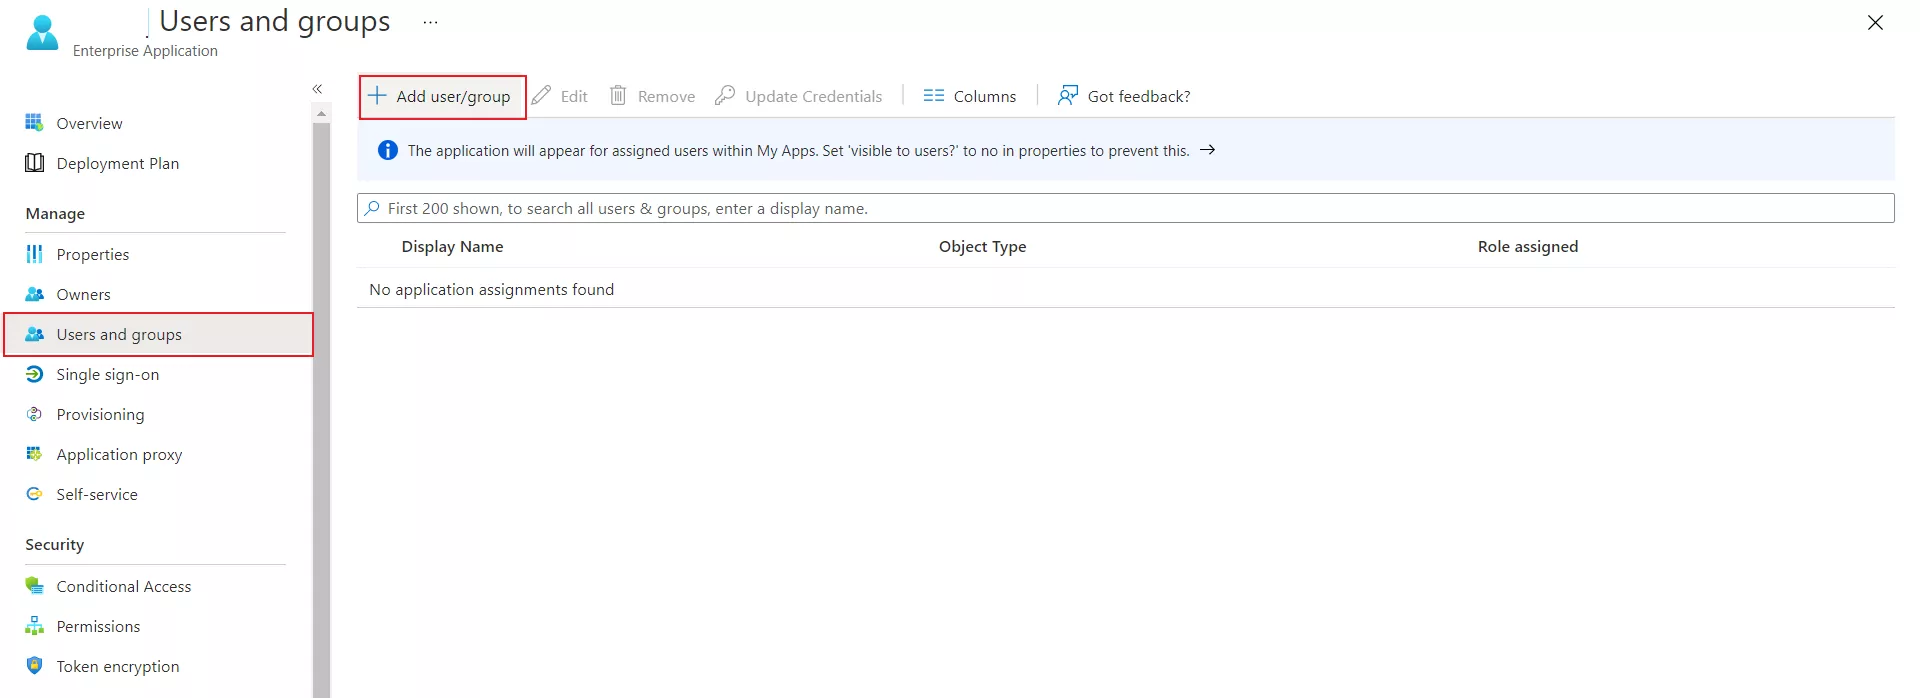
- Assign users and groups to your SAML application
- Navigate to Users and groups tab and click on Add user/group.
- Assign users and groups to your SAML application
-
-
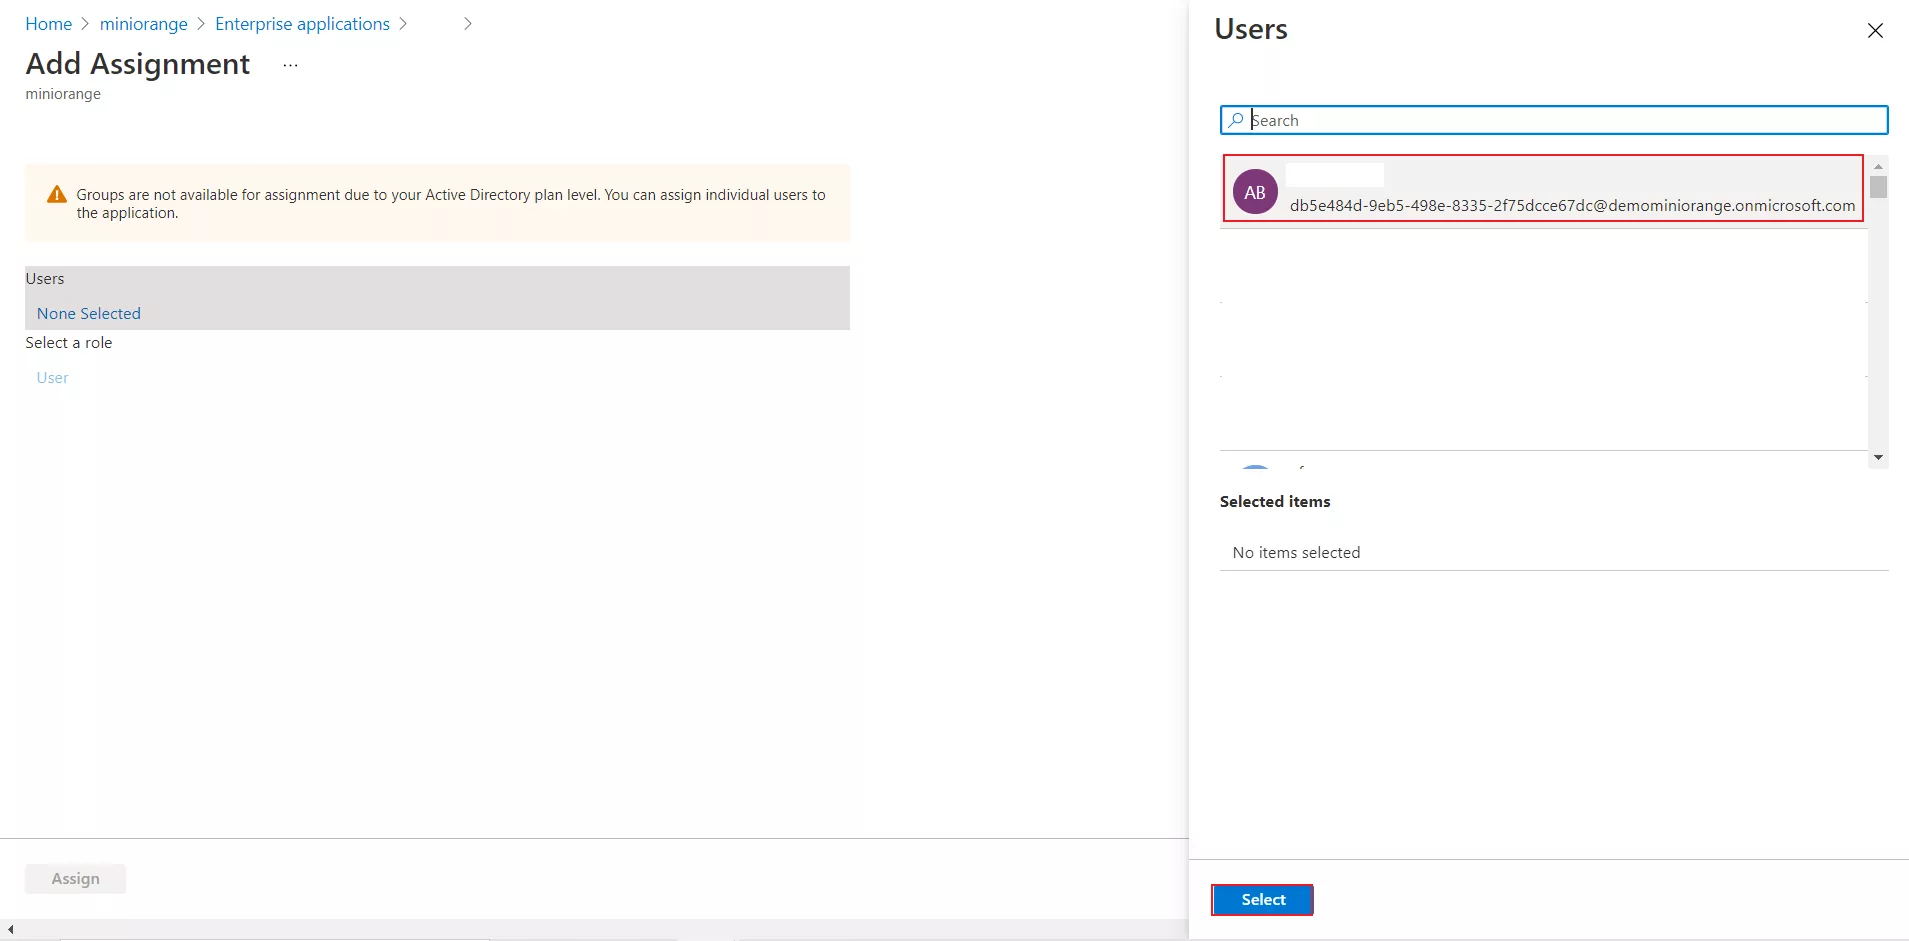
- Click on Users to assign the required user and then click on select.
-
-
- You can also assign a role to your application under Select Role section.
- You have successfully configured Azure AD as SAML IdP ( Identity Provider) for achieving Azure AD SSO login into your WordPress (WP) Site.
2. Configuring WordPress as SP (Service Provider)
-
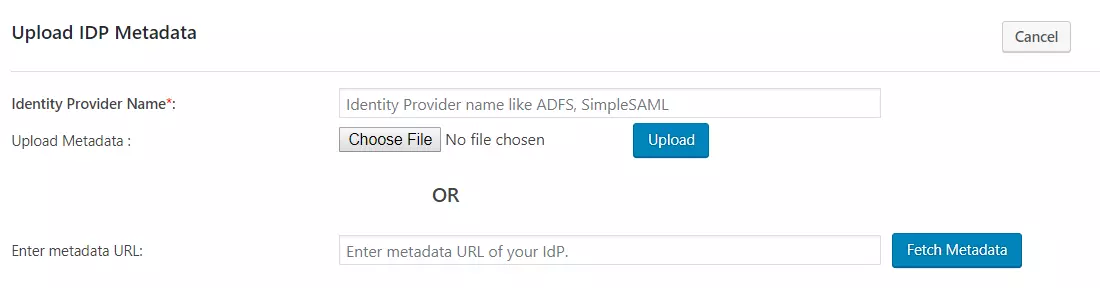
- Click on Upload IDP metadata button.
- Enter the Identity Provider Name
- You can either upload a metadata file and click on Upload button or use a metadata URL and click on Fetch Metadata.
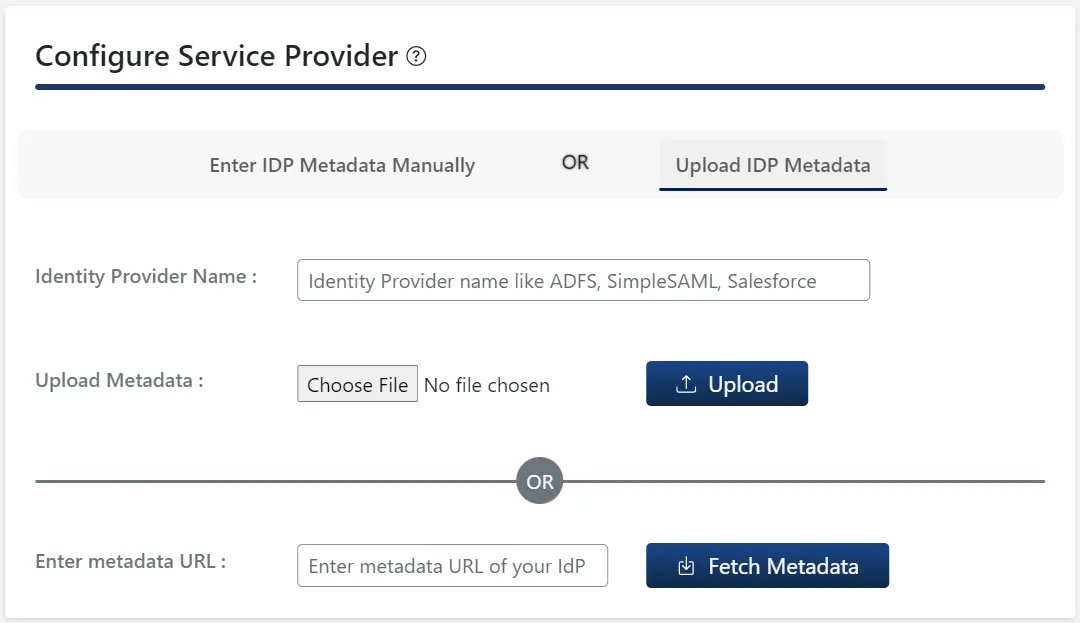
B.Manual Configuration:
- Provide the required settings (i.e. Identity Provider Name, IdP Entity ID or Issuer, SAML Login URL, X.509 Certificate) as provided by your Identity Provider and click on the Save button.
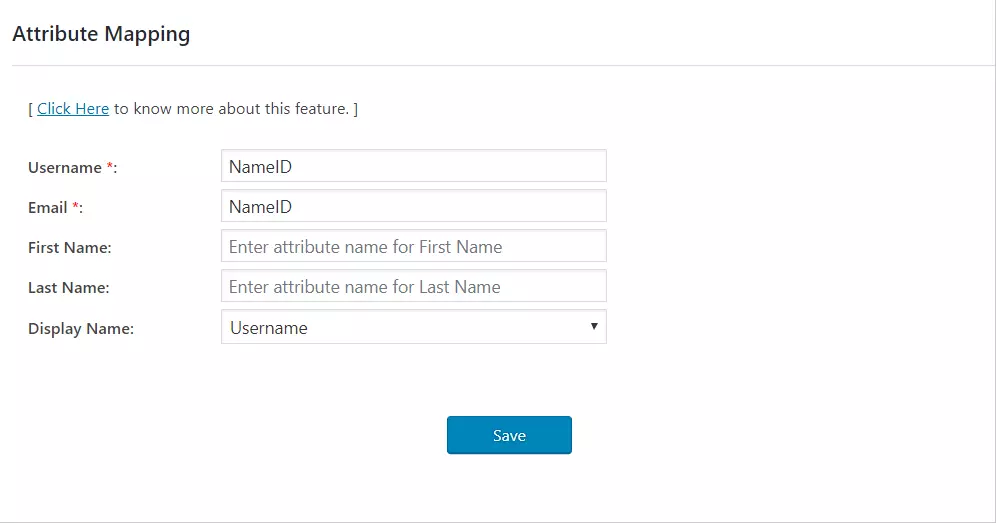
Step 3: Attribute Mapping
-
- In the free plugin, only NameID is supported for Email and Username attributes of the WordPress user.
- When a user performs SSO, the NameID value sent by the IDP will get mapped to the email and username of the WordPress user.
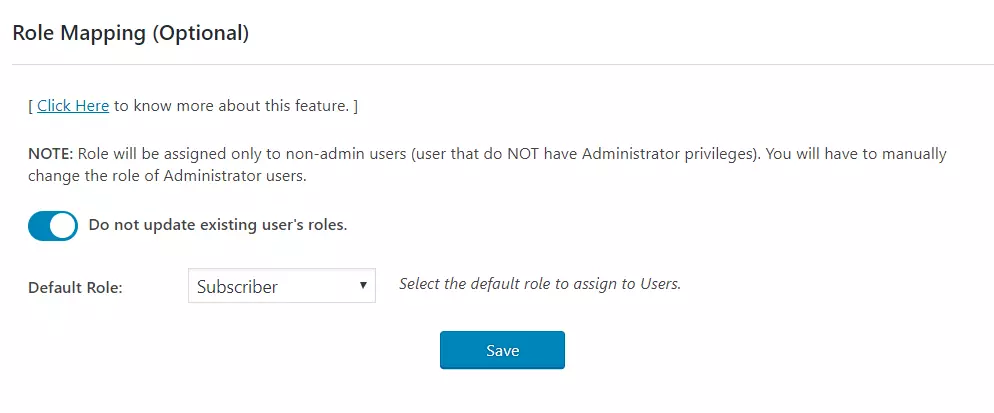
Step 4: Role Mapping
-
- In the free plugin, you can choose a Default Role which will be assigned to all the non-admin users when they perform SSO.
- Go to Attribute/Role mapping tab and navigate to Role Mapping section.
- Select the Default Role and click on the Update button.
Step 5: SSO settings
-
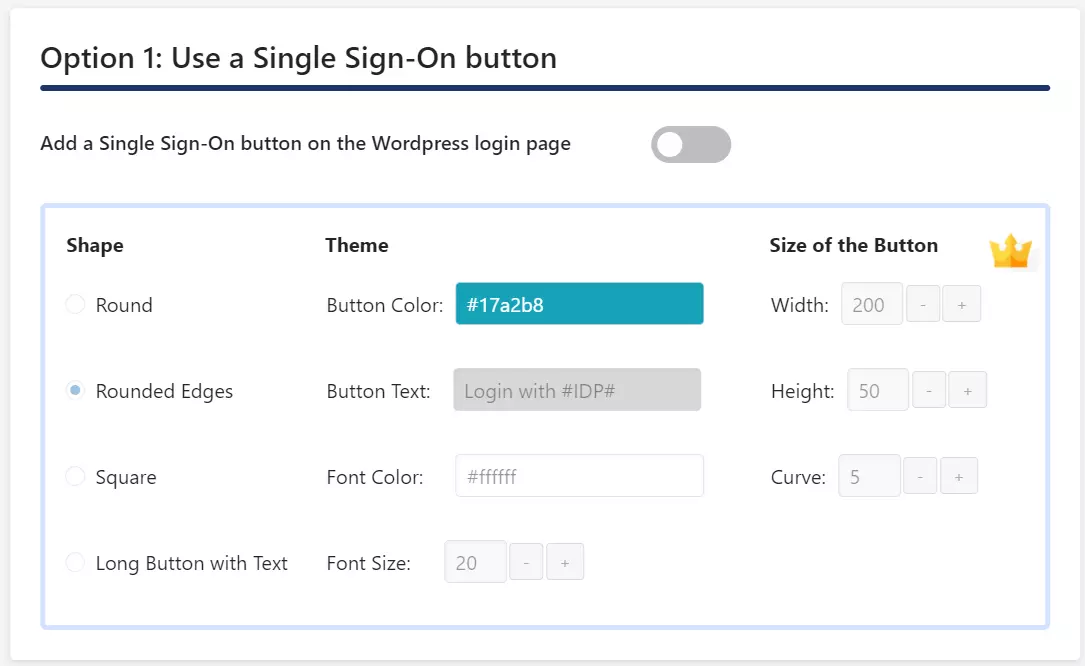
- In the free plugin you can add a Single Sign-On button by enabling Add a Single Sign-On button on the WordPress Login Page toggle in Option 1.
-
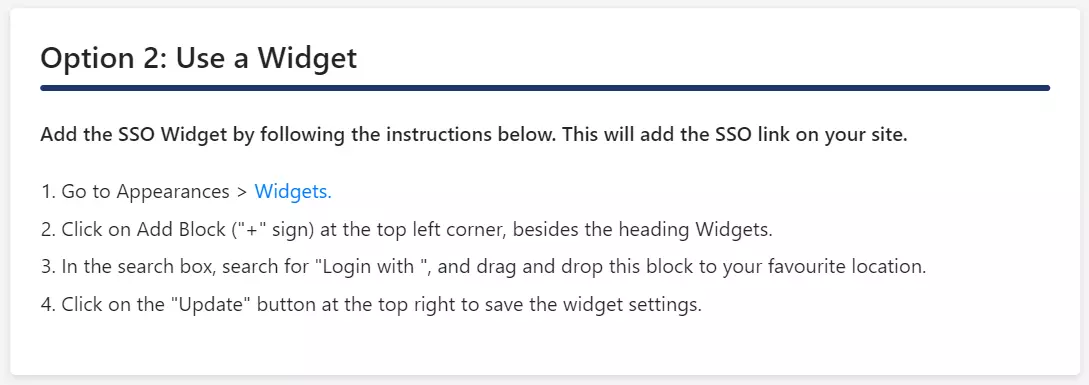
- If your WordPress theme supports login widget, you can add a login widget to enable SP-Initiated SSO on your site.
- Navigate to Redirection and SSO links tab and follow the given steps given under Option 2: Use a Widget to add a login widget on your site.
- Click on Upload IDP metadata button.
- Enter the Identity Provider Name
- You can either upload a metadata file and click on Upload button or use a metadata URL and click on Fetch Metadata.
B.Manual Configuration:
- Provide the required settings (i.e. Identity Provider Name, IdP Entity ID or Issuer, SAML Login URL, X.509 Certificate) as provided by your Identity Provider and click on the Save button.
Step 3: Attribute Mapping
-
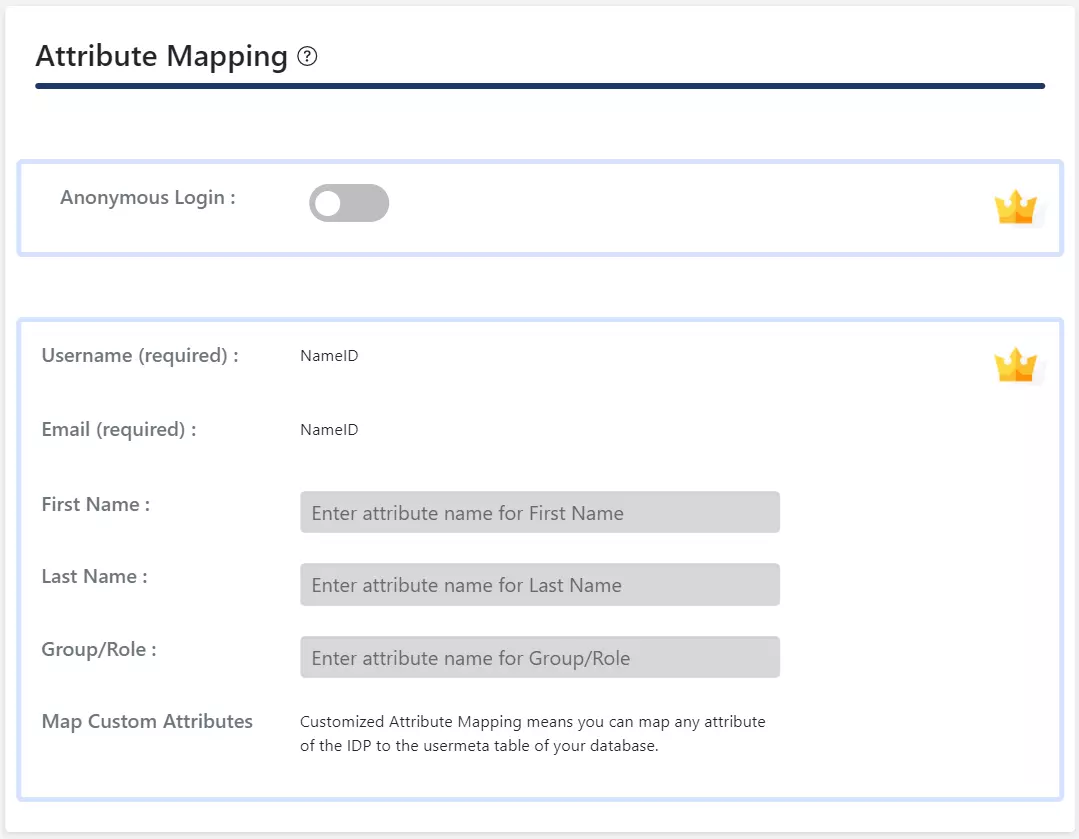
- Attribute Mapping feature allows you to map the user attributes sent by the IDP during SSO to the user attributes at WordPress.
- In WordPress SAML plugin, go to Attribute/Role Mapping tab and fill up the following fields in Attribute Mapping section.
NOTE: If you click on Test Configuration button in Service Provider Setup tab and authenticate with your IDP, you can see a list of attributes sent by the IDP in the Attribute/Role mapping tab. This information can be used to
provide the above mapping.
Step 4: Role Mapping
In the standard plugin, you can choose a default role which will be assigned to all the non-admin users when they perform SSO.
-
- Go to Attribute/Role mapping tab and navigate to Role Mapping section.
- Select the Default Role and click on the Save button.
Step 5: SSO settings
In the Standard plugin you can enable SP-initiated SSO using the following options.
-
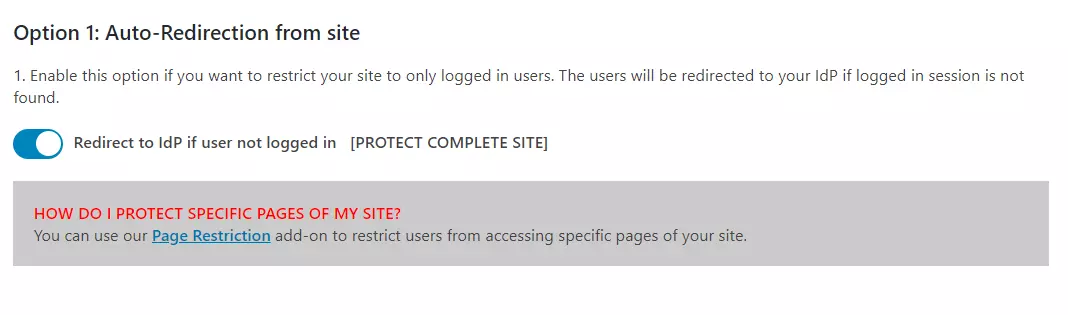
- Auto-Redirection from site: If this option is enabled, any unauthenticated user trying to access your site will get redirected to the IDP login page and after successful authentication, they will be redirected back to the same page
on your site which they were trying to access.
- Auto-Redirection from site: If this option is enabled, any unauthenticated user trying to access your site will get redirected to the IDP login page and after successful authentication, they will be redirected back to the same page
Steps:
-
-
- Go to Redirection and SSO Links tab of the plugin and navigate to Option 1: Auto – Redirection from site.
- Enable Redirect to IdP if user not logged in [PROTECT COMPLETE SITE]option.
-
-
- Auto-Redirection from WordPress Login: If this option is enabled, any unauthenticated user trying to access the default WordPress login page will get redirected to the IDP login page for authentication. After successful authentication,
they will be redirected back to the WordPress site.
- Auto-Redirection from WordPress Login: If this option is enabled, any unauthenticated user trying to access the default WordPress login page will get redirected to the IDP login page for authentication. After successful authentication,
Steps:
-
-
- Go to Redirection and SSO Links tab of the plugin and navigate to Option 2: Auto- Redirection from WordPress Login.
- Enable Redirect to IdP from WordPress Login Page option.
-

NOTE: Please enable the Backdoor login and note down the backdoor URL. This will allow you to access the WordPress login page in case you get locked out of the IDP.
-
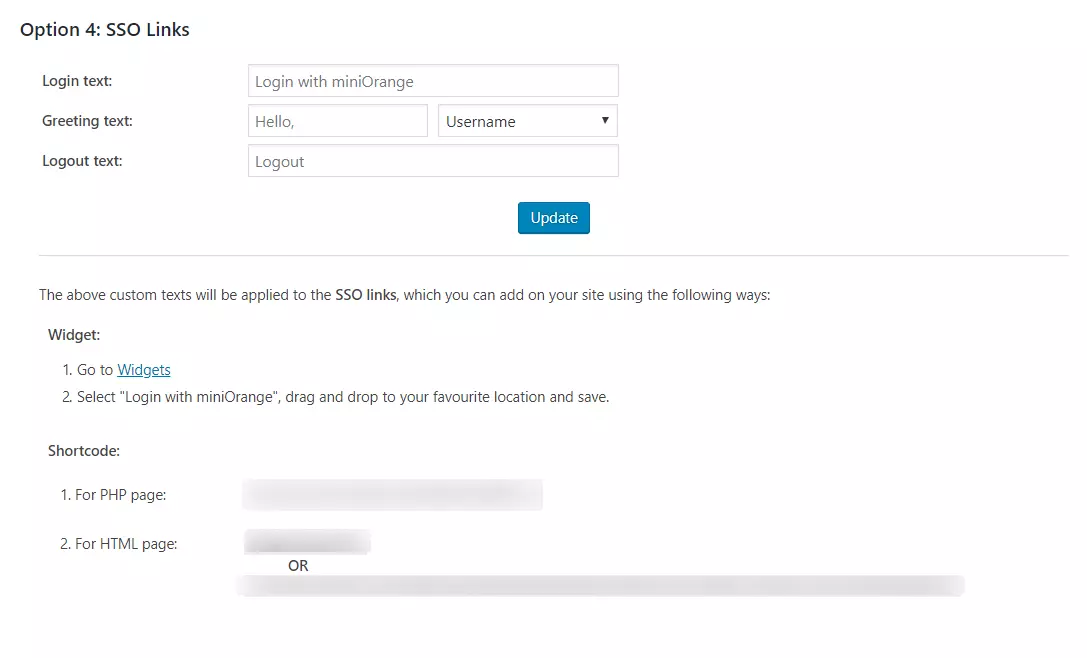
- SSO Links: You can add SSO links anywhere on your site using the Shortcode and Widget provided in Redirection and SSO Links tab > Option 3: SSO Links section of the plugin

-
- Click on Upload IDP metadata button.
- Enter the Identity Provider Name
- You can either upload a metadata file and click on Upload button or use a metadata URL and click on Fetch Metadata.
- In the Premium plugin, you can enable auto-sync for the metadata URL which will auto-update the plugin configuration as per the IDP metadata after a set interval of time
B.Manual Configuration:
- Provide the required settings (i.e. Identity Provider Name, IdP Entity ID or Issuer, SAML Login URL, X.509 Certificate) as provided by your Identity Provider and click on the Save button.
- In the Premium Plugin, you can provide the SAML Logout URL to achieve Single Logout on your WordPress site.
Step 3: Attribute Mapping
-
- Attribute Mapping feature allows you to map the user attributes sent by the IDP during SSO to the user attributes at WordPress.
- In WordPress SAML plugin, go to Attribute/Role Mapping tab and fill up the following fields in Attribute Mapping section.

-
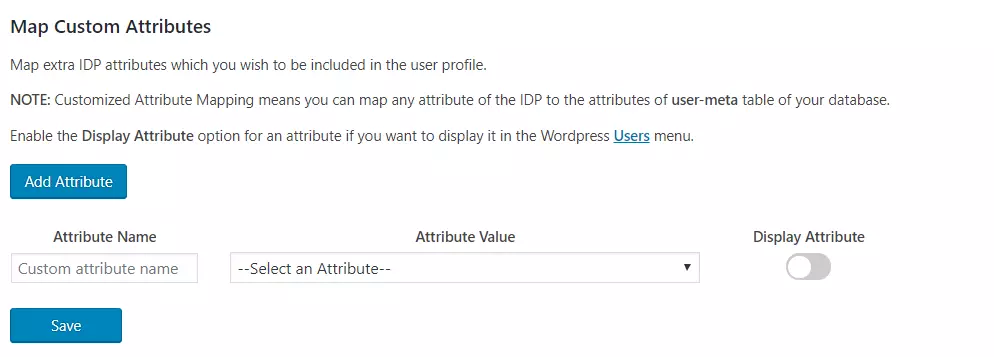
- Custom Attribute Mapping: This feature allows you to map any attribute sent by the IDP to the usermeta table of WordPress.
Step 4: Role Mapping
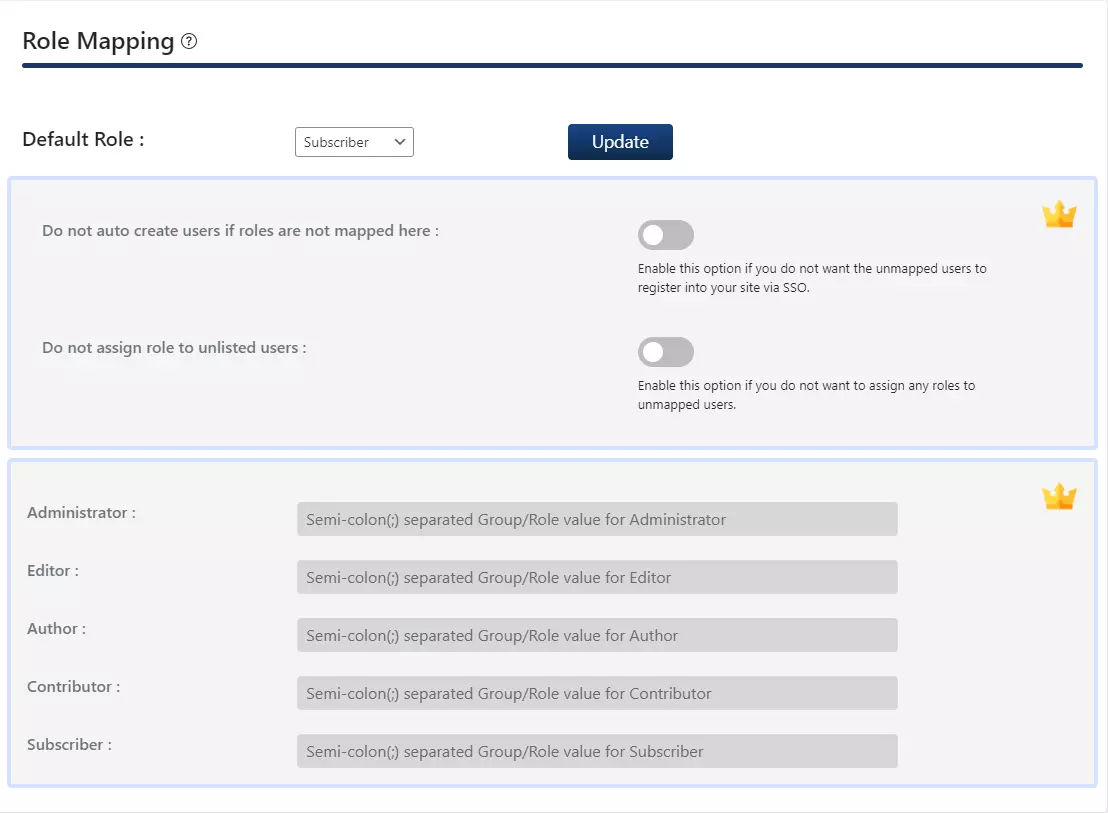
This feature allows you to assign and manage roles of the users when they perform SSO. Along with the default WordPress roles, this is compatible with any custom roles as well.
-
- From the Attribute Mapping section of the plugin, provide a mapping for the field named Group/Role. This attribute will contain the role related information sent by the IDP and will be used for Role Mapping.
- Navigate to role mapping section and provide the mappings for the highlighted roles.
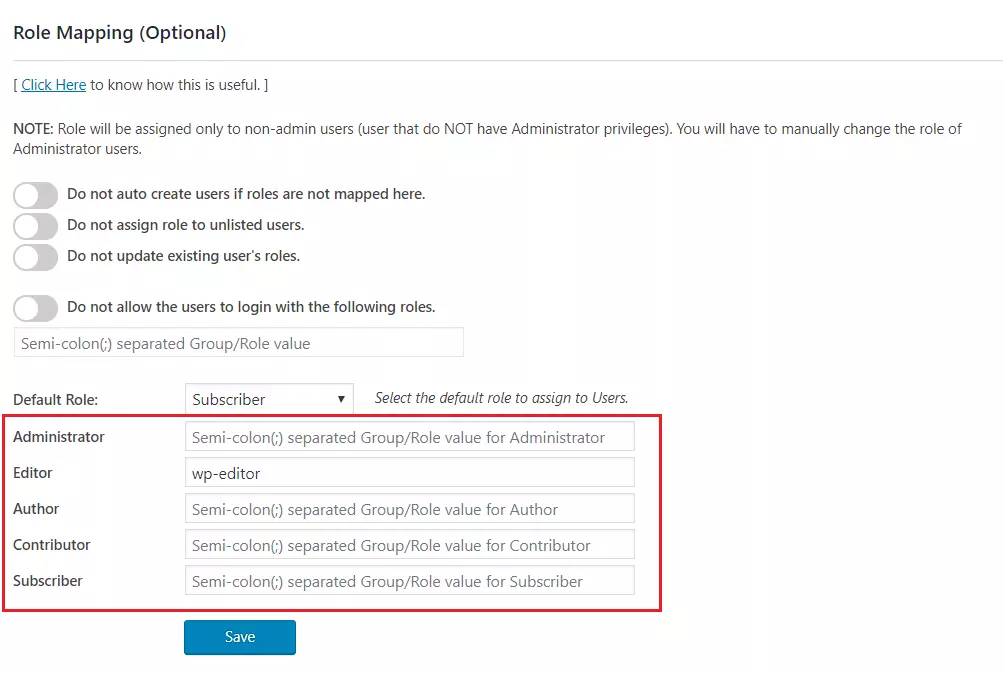
- For example, If you want a user whose Group/Role attribute value is wp-editor to be assigned as an Editor in WordPress, just provide the mapping as wp-editor in the Editor field of Role Mapping section.
Step 5: SSO Settings
In the Premium plugin you can enable SP-initiated SSO using the following options.
-
- Auto-Redirection from site: If this option is enabled, any unauthenticated user trying to access your site will get redirected to the IDP login page and after successful authentication they will be redirected back to the same page on
your site which they were trying to access.
- Auto-Redirection from site: If this option is enabled, any unauthenticated user trying to access your site will get redirected to the IDP login page and after successful authentication they will be redirected back to the same page on
Steps:
-
-
- Go to Redirection and SSO Links tab of the plugin and navigate to Option 1 : Auto-Redirection from site.
- Enable Redirect to IdP if user not logged in [PROTECT COMPLETE SITE] option.
-

-
- Auto-Redirection from WordPress Login: If this option is enabled, any unauthenticated user trying to access the default WordPress login page will get redirected to the IDP login page for authentication. After successful authentication,
they will be redirected back to the WordPress site.
- Auto-Redirection from WordPress Login: If this option is enabled, any unauthenticated user trying to access the default WordPress login page will get redirected to the IDP login page for authentication. After successful authentication,
Steps:
-
-
- Go to Redirection and SSO Links tab of the plugin and navigate to Option 2: Auto- Redirection from WordPress Login.
- Enable Redirect to IdP from WordPress Login Page option.
-
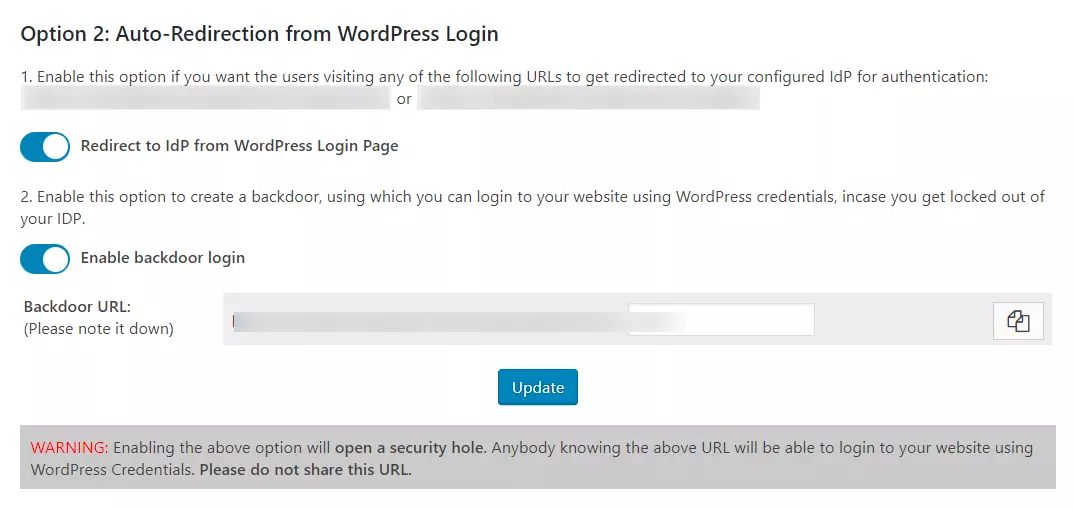
NOTE: Please enable the Backdoor login and note down the backdoor URL. This will allow you to access the WordPress login page in case you get locked out of the IDP login.
-
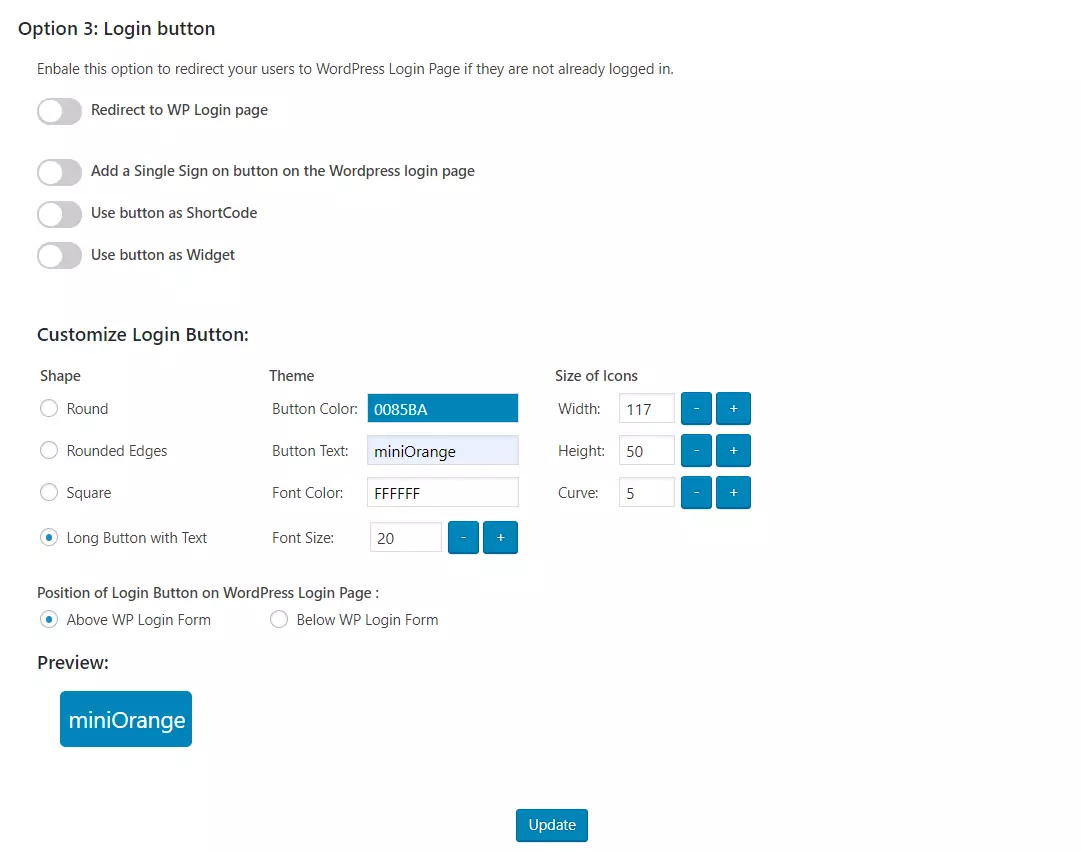
- Login Button: You can add a customized login button anywhere on your site or WordPress login page by navigating to Option 3: Login Button section of Redirection and SSO Links tab.
-
- SSO Links: You can add SSO links anywhere on your site using the Shortcode and Widget provided in Option 4: SSO Links section of Redirection and SSO Links tab.